「Kernel」Linux kernel lab 浅浅跟随
Before We Begin
In this article, we will follow along with Linux Kernel Teaching, progressing from basic to advanced kernel studies, to prepare for potential future kernel development work.
It’s worth noting that this course also has a Chinese version, and you can support their efforts by starring the repository at linux-kernel-labs-zh/docs-linux-kernel-labs-zh-cn.
In subsequent blog posts, I may simply summarize the course content, as copying existing material without adding my own insights would be pointless. Our focus will be on the experimental sections.
{/* truncate */}
Infrastructure
In this section, we will set up the experimental environment. I use Docker within WSL2 for my experimental environment, which is very convenient.
curl -LO https://raw.githubusercontent.com/linux-kernel-labs-zh/so2-labs/main/local.shchmod +x ./local.shsudo ./local.sh docker interactiveAfterwards, by setting the environment variable LABS, you can generate different experiment skeletons using make skels. For example:
root@MuelNova-Laptop:/linux/tools/labs# LABS=kernel_modules make skels -j$(nproc)mkdir -p skelscd templates && find kernel_modules -type f | xargs ./generate_skels.py --output ../skels --todo 0skel kernel_modules/5-oops-mod/oops_mod.cskel kernel_modules/5-oops-mod/Kbuildskel kernel_modules/3-error-mod/err_mod.cskel kernel_modules/3-error-mod/Kbuildskel kernel_modules/1-2-test-mod/hello_mod.cskel kernel_modules/1-2-test-mod/Kbuildskel kernel_modules/9-dyndbg/dyndbg.cskel kernel_modules/9-dyndbg/Kbuildskel kernel_modules/8-kdb/hello_kdb.cskel kernel_modules/8-kdb/Kbuildskel kernel_modules/7-list-proc/list_proc.cskel kernel_modules/7-list-proc/Kbuildskel kernel_modules/4-multi-mod/mod1.cskel kernel_modules/4-multi-mod/mod2.cskel kernel_modules/4-multi-mod/Kbuildskel kernel_modules/6-cmd-mod/cmd_mod.cskel kernel_modules/6-cmd-mod/Kbuildrm -f skels/Kbuildroot@MuelNova-Laptop:/linux/tools/labs# ls skels/kernel_modules/1-2-test-mod 3-error-mod 4-multi-mod 5-oops-mod 6-cmd-mod 7-list-proc 8-kdb 9-dyndbgFor detailed instructions, see https://github.com/linux-kernel-labs-zh/so2-labs
WSL2 Environment
Due to my WSL2 being in mirrored mode, I couldn’t enter its console mode, so I spent some time exploring this issue, which is documented in #3.
In short, I changed the used IP subnet to an unused one.
diff --git a/tools/labs/qemu/Makefile b/tools/labs/qemu/Makefileindex e9ee4ec1b..6e10ac6f0 100644--- a/tools/labs/qemu/Makefile+++ b/tools/labs/qemu/Makefile@@ -135,7 +135,7 @@ rootfs: $(YOCTO_ROOTFS)   printf '%s\n' '#!/bin/sh' '/bin/login -f root' > rootfs/sbin/rootlogin   chmod +x rootfs/sbin/rootlogin   mkdir -p rootfs/home/root/skels-  echo "//10.0.2.1/skels /home/root/skels cifs port=4450,guest,user=dummy 0 0" >> rootfs/etc/fstab+  echo "//172.31.2.1/skels /home/root/skels cifs port=4450,guest,user=dummy 0 0" >> rootfs/etc/fstab   echo "hvc0:12345:respawn:/sbin/getty 115200 hvc0" >> rootfs/etc/inittab
$(YOCTO_ROOTFS):diff --git a/tools/labs/qemu/create_net.sh b/tools/labs/qemu/create_net.shindex c97b6fa0a..f803ed1e4 100755--- a/tools/labs/qemu/create_net.sh+++ b/tools/labs/qemu/create_net.sh@@ -18,7 +18,7 @@ case "$device" in         subnet=172.30.0         ;;     "lkt-tap-smbd")-        subnet=10.0.2+        subnet=172.31.2         ;;     *)         echo "Unknown device" 1>&2diff --git a/tools/labs/qemu/run-qemu.sh b/tools/labs/qemu/run-qemu.shindex 9938ec18e..abd245be1 100755--- a/tools/labs/qemu/run-qemu.sh+++ b/tools/labs/qemu/run-qemu.sh@@ -24,7 +24,7 @@ case "$mode" in         ;;     gui)         # QEMU_DISPLAY = sdl, gtk, ...-        qemu_display="-display ${QEMU_DISPLAY:-"sdl"}"+        qemu_display="-display ${QEMU_DISPLAY:-"gtk"}"         linux_console=""         ;;     checker)@@ -56,13 +56,13 @@ linux_loglevel=${LINUX_LOGLEVEL:-"15"} linux_term=${LINUX_TERM:-"TERM=xterm"} linux_addcmdline=${LINUX_ADD_CMDLINE:-""}
-linux_cmdline=${LINUX_CMDLINE:-"root=/dev/cifs rw ip=dhcp cifsroot=//10.0.2.1/rootfs,port=4450,guest,user=dummy $linux_console loglevel=$linux_loglevel pci=noacpi $linux_term $linux_addcmdline"}+linux_cmdline=${LINUX_CMDLINE:-"root=/dev/cifs rw ip=dhcp cifsroot=//172.31.2.1/rootfs,port=4450,guest,user=dummy $linux_console loglevel=$linux_loglevel pci=noacpi $linux_term $linux_addcmdline"}
user=$(id -un)
cat << EOF > "$SAMBA_DIR/smbd.conf"[global]-    interfaces = 10.0.2.1+    interfaces = 172.31.2.1     smb ports = 4450     private dir = $SAMBA_DIR     bind interfaces only = yes
VS-Code Development Environment
I set up a vsc environment. First, VS Code can directly connect to containers using dev containers, then install clangd.
Method 1
In the container environment, install clang and bear.
root@MuelNova-Laptop:/linux# apt install -y bear clangThen generate compile_commands.json.
root@MuelNova-Laptop:/linux# bear make CC=clangThen open the remote settings.json and add the following line:
{ "clangd.arguments": [ // highlight-next-line "--compile-commands-dir=/linux" ]}Note that you need to rebuild, otherwise the environment will break.
Method 2
Downloading is too cumbersome, so create a compile_commands.json file directly.
Add the following:
[ { "arguments": [ "clang", "-c", "-Wp,-MMD,scripts/mod/.empty.o.d", "-nostdinc", "-isystem", "/usr/lib/llvm-10/lib/clang/10.0.0/include", "-I./arch/x86/include", "-I./arch/x86/include/generated", "-I./include", "-I./arch/x86/include/uapi", "-I./arch/x86/include/generated/uapi", "-I./include/uapi", "-I./include/generated/uapi", "-include", "./include/linux/kconfig.h", "-include", "./include/linux/compiler_types.h", "-D__KERNEL__", "-Qunused-arguments", "-fmacro-prefix-map=./=", "-Wall", "-Wundef", "-Werror=strict-prototypes", "-Wno-trigraphs", "-fno-strict-aliasing", "-fno-common", "-fshort-wchar", "-fno-PIE", "-Werror=implicit-function-declaration", "-Werror=implicit-int", "-Werror=return-type", "-Wno-format-security", "-std=gnu89", "-no-integrated-as", "-Werror=unknown-warning-option", "-mno-sse", "-mno-mmx", "-mno-sse2", "-mno-3dnow", "-mno-avx", "-m32", "-msoft-float", "-mregparm=3", "-freg-struct-return", "-fno-pic", "-mstack-alignment=4", "-march=i686", "-Wa,-mtune=generic32", "-ffreestanding", "-Wno-sign-compare", "-fno-asynchronous-unwind-tables", "-mretpoline-external-thunk", "-fno-delete-null-pointer-checks", "-Wno-address-of-packed-member", "-O2", "-Wframe-larger-than=1024", "-fstack-protector-strong", "-Wno-format-invalid-specifier", "-Wno-gnu", "-mno-global-merge", "-Wno-unused-const-variable", "-fno-omit-frame-pointer", "-fno-optimize-sibling-calls", "-g", "-gdwarf-4", "-Wdeclaration-after-statement", "-Wvla", "-Wno-pointer-sign", "-Wno-array-bounds", "-fno-strict-overflow", "-fno-stack-check", "-Werror=date-time", "-Werror=incompatible-pointer-types", "-fcf-protection=none", "-Wno-initializer-overrides", "-Wno-format", "-Wno-sign-compare", "-Wno-format-zero-length", "-Wno-tautological-constant-out-of-range-compare", "-DKBUILD_MODFILE=\"scripts/mod/empty\"", "-DKBUILD_BASENAME=\"empty\"", "-DKBUILD_MODNAME=\"empty\"", "-o", "scripts/mod/empty.o", "scripts/mod/empty.c" ], "directory": "/linux", "file": "scripts/mod/empty.c" }]Then open the remote `sett```json { “clangd.arguments”: [ // highlight-next-line “—compile-commands-dir=/linux/tools/lab” ] }
## Kernel Modules
> https://linux-kernel-labs-zh.xyz/labs/kernel_modules.html
### Objectives
- [x] Create a simple module- [x] Describe the process of compiling kernel modules- [x] Demonstrate how to use modules in the kernel- [x] Simple kernel debugging methods
### 0. Introduction
> Use cscope or LXR to search for the definitions of the following symbols in the Linux kernel source code:>> - `module_init()` and `module_exit()`>   What are these macros for? What are `init_module` and `cleanup_module`?> - `ignore_loglevel`>   What is this variable used for?
The Docker setup has been configured, so we can directly use cscope to search.```bashvim -t module_init
However, this search yields references rather than definitions, so let’s use Linux source code (v6.9.9) - Bootlin to search.
/* Each module must use one module_init(). */#define module_init(initfn)          \  static inline initcall_t __maybe_unused __inittest(void)    \  { return initfn; }          \  int init_module(void) __copy(initfn)      \    __attribute__((alias(#initfn)));    \  ___ADDRESSABLE(init_module, __initdata);
/* This is only required if you want to be unloadable. */#define module_exit(exitfn)          \  static inline exitcall_t __maybe_unused __exittest(void)    \  { return exitfn; }          \  void cleanup_module(void) __copy(exitfn)    \    __attribute__((alias(#exitfn)));    \  ___ADDRESSABLE(cleanup_module, __exitdata);
#endif
Macros are hard to read. Here, a function called __inittest is defined, which returns a pointer to the initfn that we pass in and is called as an entry point after the module is inserted. Then, it defines an int type function init_module, where the __copy macro sets the __copy__ attribute and also sets an alias of #initfn; these are used to provide information to the compiler.
module_exit is similar, so we won’t explain it further.
For ignore_loglevel, its literal meaning is to ignore log levels and output everything.
static bool __read_mostly ignore_loglevel;
static bool suppress_message_printing(int level){  return (level >= console_loglevel && !ignore_loglevel);}
1. Kernel Module
Start the virtual machine with
make consoleand perform the following tasks:
- Load the kernel module.
- List kernel modules and check if the current module exists.
- Unload the kernel module.
- Use the
dmesgcommand to view messages displayed when loading/unloading kernel modules.
First, we generate the skeleton.
LABS=kernel_modules make skelsNote that there is a skels named error-mod, indicating it has errors, so we first delete it and regenerate it later once it’s fixed.
root@MuelNova-Laptop:/linux/tools/labs# rm skels/kernel_modules/3-error-mod/ -rroot@MuelNova-Laptop:/linux/tools/labs# make buildroot@MuelNova-Laptop:/linux/tools/labs# make consoleIn theory, make console should allow us to enter directly, but pressing Enter did not work. So we first run make copy to copy the driver into the virtual machine, then make boot to generate the virtual machine, and then manually connect.
# tmux 1make boot# tmux 2minicom -D serial.pts# <Enter>Poky (Yocto Project Reference Distro) 2.3 qemux86 /dev/hvc0
qemux86 login: root
root@qemux86:~/skels/kernel_modules/1-2-test-mod# insmod hello_mod.koHello!root@qemux86:~/skels/kernel_modules/1-2-test-mod# lsmod Tainted: Ghello_mod 16384 0 - Live 0xd085f000 (O)root@qemux86:~/skels/kernel_modules/1-2-test-mod# rmmod hello_mod.koGoodbye!2. Printk
Observe the virtual machine console. Why are messages displayed directly on the virtual machine console?
Configure the system so that messages are not displayed directly on the serial console and can only be viewed using the
dmesgcommand.
Looking at the code, we can see that it uses pr_debug, which means a log level of 7. We can check the level in /proc/sys/kernel/printk.
root@qemux86:~# cat /proc/sys/kernel/printk15 4 1 7We can see that the current level is 14, the default log level is 4, the lowest level is 1, and the default console log level is 7.
We can simply change it to 4.
root@qemux86:~# insmod skels/kernel_modules/1-2-test-mod/hello_mod.koHello!root@qemux86:~# rmmod skels/kernel_modules/1-2-test-mod/hello_mod.koGoodbye!root@qemux86:~# echo 4 > /proc/sys/kernel/printkroot@qemux86:~# insmod skels/kernel_modules/1-2-test-mod/hello_mod.koroot@qemux86:~# rmmod skels/kernel_modules/1-2-test-mod/hello_mod.koroot@qemux86:~#3. Errors
Generate the framework for the task named
3-error-mod. Compile the source code and get the corresponding kernel module.Why are there compilation errors? Hint: How does this module differ from the previous one?
Modify the module to address the causes of these errors, then compile and test the module.
Generate its code.
LABS=kernel_modules/3-error-mod make skelsFirst, we compile it to see what the error is.
/linux/tools/labs/skels/./kernel_modules/3-error-mod/err_mod.c:5:20: error: expected declaration specifiers or '...' before string constant 5 | MODULE_DESCRIPTION("Error module"); | ^~~~~~~~~~~~~~/linux/tools/labs/skels/./kernel_modules/3-error-mod/err_mod.c:6:15: error: expected declaration specifiers or '...' before string constant 6 | MODULE_AUTHOR("Kernel Hacker"); | ^~~~~~~~~~~~~~~/linux/tools/labs/skels/./kernel_modules/3-error-mod/err_mod.c:7:16: error: expected declaration specifiers or '...' before string constant 7 | MODULE_LICENSE("GPL");It seems that there is an issue with the arguments to these functions, so it is likely that a header file is missing.
In the file 1:
#include <linux/module.h>#include <linux/init.h>#include <linux/kernel.h>In the file 3, the <linux/module.h> header is missing.
#include <linux/init.h>#include <linux/kernel.h>Checking these macro definitions, we find they all come from include/linux/module.h, so adding this header will fix the issue.
// highlight-next-line#include <linux/module.h>#include <linux/init.h>#include <linux/kernel.h>root@qemux86:~/skels/kernel_modules/3-error-mod# ls err_mod.koroot@qemux86:~/skels/kernel_modules/3-error-mod# insmod err_mod.koerr_mod: loading out-of-tree module taints kernel.n1 is 1, n2 is 24. Submodules
Look at the C source files
mod1.candmod2.cin the directory4-multi-mod/. Module 2 only contains the definitions of functions used by module 1.Modify the
Kbuildfile to create themulti_mod.komodule from these two C source files.
We can see that 4 does not have an obj-m rule.
root@MuelNova-Laptop:/linux/tools/labs/skels/kernel_modules/4-multi-mod# cat Kbuildccflags-y = -Wno-unused-function -Wno-unused-label -Wno-unused-variable
# TODO: add rules to create a multi object moduleroot@MuelNova-Laptop:/linux/tools/labs/skels/kernel_modules/4-multi-mod# cat ../1-2-test-mod/Kbuildccflags-y = -Wno-unused-function -Wno-unused-label -Wno-unused-variable -DDEBUG
obj-m = hello_mod.o
Since we want to compile module 2 along with module 1, we first need to link them together ($(module_name)-y), and then compile obj-m.
ccflags-y = -Wno-unused-function -Wno-unused-label -Wno-unused-variable
# TODO: add rules to create a multi object module# highlight-startmulti-y = mod1.o mod2.oobj-m = multi.o# highlight-end
After recompiling, we can see that 4 has successfully compiled and runs normally.
root@qemux86:~/skels/kernel_modules/4-multi-mod# insmod multi.komulti: loading out-of-tree module taints kernel.n1 is 1, n2 is 2root@qemux86:~/skels/kernel_modules/4-multi-mod# rmmod multi.kosum is 35. Kernel Oops
A kernel oops is an invalid operation detected by the kernel, which can only be generated by the kernel. For stable kernel versions, this almost certainly means that the module contains errors. After an oops occurs, the kernel will continue to work.
Go into the task directory
5-oops-modand inspect the C source code file. Note where the problem will occur. Add the compilation flag-gto theKbuildfile.
Looking at its source code, there appears to be a null pointer dereference.
static int my_oops_init(void){        char *p = 0;
        pr_info("before init\n");        *p = 'a';        pr_info("after init\n");
        return 0;}
Let’s insmod it and look at dmsg.
Oops: 0002 [#1] SMPCPU: 0 PID: 238 Comm: insmod Tainted: G           O      5.10.14+ #1Hardware name: QEMU Standard PC (i440FX + PIIX, 1996), BIOS 1.13.0-1ubuntu1.1 04/01/2014EIP: my_oops_init+0xd/0x22 [oops_mod]Code: Unable to access opcode bytes at RIP 0xd0865fe3.EAX: 0000000b EBX: 00000000 ECX: cfdc9d6c EDX: 0133efa3ESI: d0866000 EDI: 00000002 EBP: c2a81dd8 ESP: c2a81dd4DS: 007b ES: 007b FS: 00d8 GS: 00e0 SS: 0068 EFLAGS: 00000282CR0: 80050033 CR2: d0865fe3 CR3: 04362000 CR4: 00000690Call Trace: do_one_initcall+0x57/0x2d0 ? rcu_read_lock_sched_held+0x47/0x80                                                                                                                                                                              ? kmem_cache_alloc_trace+0x2ed/0x370 ? do_init_module+0x1f/0x210 do_init_module+0x4e/0x210 load_module+0x20a4/0x2580 __ia32_sys_init_module+0xed/0x130 do_int80_syscall_32+0x2c/0x40 entry_INT80_32+0xf7/0xf7EIP: 0x44902cc2Code: 06 89 8a 84 01 00 00 c3 55 57 56 53 8b 6c 24 2c 8b 7c 24 28 8b 74 24 24 8b 54 24 20 8b 4c 24 1c 8b 5c 24 18 8b 44 24 14 cd 80 <5b> 5e 5f 5d 3d 01 f0 ff ff 0f 83 bf 76 f4 ff c3 66 90 66 90 66 90EAX: ffffffda EBX: 09a8b050 ECX: 0001cfd8 EDX: 09a8b0```08ESI: 00000000 EDI: bfcc3dec EBP: 00000000 ESP: bfcc3c4cDS: 007b ES: 007b FS: 0000 GS: 0033 SS: 007b EFLAGS: 00000206Modules linked in: oops_mod(O+)CR2: 0000000000000000---[ end trace a8efa95c8be6f1d2 ]---EIP: my_oops_init+0xd/0x22 [oops_mod]Code: Unable to access opcode bytes at RIP 0xd0865fe3.EAX: 0000000b EBX: 00000000 ECX: cfdc9d6c EDX: 0133efa3ESI: d0866000 EDI: 00000002 EBP: c2a81dd8 ESP: c2a81dd4DS: 007b ES: 007b FS: 00d8 GS: 00e0 SS: 0068 EFLAGS: 00000282CR0: 80050033 CR2: d0865fe3 CR3: 04362000 CR4: 00000690
It can be seen that there is an invalid memory write (The OOPS code is 2, indicating the first bit is 1, which means it's a write, the second bit is 0, meaning it's in kernel mode, and the zeroth bit is 0, indicating the page is not found).
:::info
To view the OOPS code, see `arch/x86/include/asm/trap_pf.h`.
```c/* * Page fault error code bits: * *   bit 0 ==   0: no page found  1: protection fault *   bit 1 ==   0: read access    1: write access *   bit 2 ==   0: kernel-mode access  1: user-mode access *   bit 3 ==        1: use of reserved bit detected *   bit 4 ==        1: fault was an instruction fetch *   bit 5 ==        1: protection keys block access *   bit 6 ==        1: shadow stack access fault *   bit 15 ==        1: SGX MMU page-fault *   bit 31 ==        1: fault was due to RMP violation */enum x86_pf_error_code {  X86_PF_PROT  =    BIT(0),  X86_PF_WRITE  =    BIT(1),  X86_PF_USER  =    BIT(2),  X86_PF_RSVD  =    BIT(3),  X86_PF_INSTR  =    BIT(4),  X86_PF_PK  =    BIT(5),  X86_PF_SHSTK  =    BIT(6),  X86_PF_SGX  =    BIT(15),  X86_PF_RMP  =    BIT(31),};
:::
We can use addr2line to see where the problem is with EIP: my_oops_init+0xd/0x22 [oops_mod].
root@MuelNova-Laptop:/linux/tools/labs# addr2line -e skels/kernel_modules/5-oops-mod/oops_mod.o 0xd/linux/tools/labs/skels/./kernel_modules/5-oops-mod/oops_mod.c:15Looking at line 15, we find the following:
#include <linux/module.h>#include <linux/init.h>#include <linux/kernel.h>#include <linux/slab.h>
MODULE_DESCRIPTION("Oops generating module");MODULE_AUTHOR("So2rul Esforever");MODULE_LICENSE("GPL");
static int my_oops_init(void){        char *p = 0;
        pr_info("before init\n");        *p = 'a';        pr_info("after init\n");
        return 0;}
static void my_oops_exit(void){        pr_info("module goes all out\n");}
As expected. To further pinpoint the specific instruction, we add the -g flag.
# TODO: add flags to generate debug informationEXTRA_CFLAGS = -g
obj-m = oops_mod.oHowever, we can directly examine the assembly, which clearly shows the issue.
root@MuelNova-Laptop:/linux/tools/labs# objdump -dS --adjust-vma=0xd0866000 skels/kernel_modules/5-oops-mod/oops_mod.kod086600d: c6 05 00 00 00 00 61 movb $0x61,0x06. Module Parameters
Navigate to the directory 6-cmd-mod and inspect the C source file
cmd_mod.c. Compile and copy the relevant module, then load the kernel module to view theprintkmessages. Unload the module from the kernel afterward.Load the kernel module without modifying the source code to display the message “Early bird gets tired”.
static char *str = "the worm";
module_param(str, charp, 0000);MODULE_PARM_DESC(str, "A simple string");
static int __init cmd_init(void){    pr_info("Early bird gets %s\n", str);    return 0;}
Clearly, we need to change str. Let’s look up the module_param macro.
/** * module_param - typesafe helper for a module/cmdline parameter * @name: the variable to alter, and exposed parameter name. * @type: the type of the parameter * @perm: visibility in sysfs. * * @name becomes the module parameter, or (prefixed by KBUILD_MODNAME and a * ".") the kernel commandline parameter. Note that - is changed to _, so * the user can use "foo-bar=1" even for variable "foo_bar". * * @perm is 0 if the variable is not to appear in sysfs, or 0444 * for world-readable, 0644 for root-writable, etc. Note that if it * is writable, you may need to use kernel_param_lock() around * accesses (esp. charp, which can be kfreed when it changes). * * The @type is simply pasted to refer to a param_ops_##type and a * param_check_##type: for convenience many standard types are provided but * you can create your own by defining those variables. * * Standard types are: * byte, hexint, short, ushort, int, uint, long, ulong * charp: a character pointer * bool: a bool, values 0/1, y/n, Y/N. * invbool: the above, only sense-reversed (N = true). */#define module_param(name, type, perm) \ module_param_named(name, name, type, perm)Clearly, it requires passing a parameter str="tired".
root@qemux86:~/skels/kernel_modules/6-cmd-mod# insmod cmd_mod.ko str="tired"cmd_mod: loading out-of-tree module taints kernel.Early bird gets tired7. Process Information
Examine the framework named 7-list-proc. Add code to display the process ID (PID) and executable filename of the current process.
Follow the commands marked as TODO. This information must be displayed when the module is loaded and unloaded.
#include <linux/init.h>#include <linux/kernel.h>#include <linux/module.h>/* TODO: add missing headers */
MODULE_DESCRIPTION("List current processes");MODULE_AUTHOR("Kernel Hacker");MODULE_LICENSE("GPL");
static int my_proc_init(void){        struct task_struct *p;
        /* TODO: print current process pid and its name */
        /* TODO: print the pid and name of all processes */
        return 0;}
static void my_proc_exit(void){        /* TODO: print current process pid and name */}
module_init(my_proc_init);module_exit(my_proc_exit);
Let’s tackle each TODO one by one.
First, we need to add the missing header. We can look up where task_struct is defined, which is in include/linux/sched.h.
Next, we need to print the current process’s PID and name. After researching, we learn that sched.h contains a macro current that returns a pointer to the current process’s task_struct.
- PID is a member of
pid_t, which is essentially an alias forsigned int, so we can directly output it. - Name is the
commcharacter array.
Thus, we can write the following code:
static int my_proc_init(void){    // hightlight-start        struct task_struct *p;        p = current;        pr_info("[I] Current PID: %d\n", p->pid);        pr_info("            Name: %s\n", p->comm);        /* TODO: print current process pid and its name */    // highlight-end
        /* TODO: print the pid and name of all processes */
return 0;}root@qemux86:~/skels/kernel_modules/7-list-proc# insmod list_proc.kolist_proc: loading out-of-tree module taints kernel.[I] Current PID: 240 Name: insmodTesting confirms that it works.
The third TODO involves printing information about all processes. We hypothesize that there is likely a list that stores all process task_structs. We just need to find it and iterate through it. Thanks to our large model, we’ve gathered information about the for_each_process macro, which can iterate over all processes.
Therefore, we can use this macro to complete the iteration.
Final code:
#include <linux/init.h>#include <linux/kernel.h>#include <linux/module.h>#include <linux/sched.h>#include <linux/sched/signal.h>/* TODO: add missing headers */
MODULE_DESCRIPTION("List current processes");MODULE_AUTHOR("Kernel Hacker");MODULE_LICENSE("GPL");
static int my_proc_init(void){        struct task_struct *p;        p = current;        pr_info("[I] Current PID: %d\n", p->pid);        pr_info("            Name: %s\n", p->comm);        /* TODO: print current process pid and its name */
        for_each_process(p) {            pr_info("[I] Current PID: %d\n", p->pid);            pr_info("            Name: %s\n", p->comm);        }        /* TODO: print the pid and name of all processes */
        return 0;}
static void my_proc_exit(void){        struct task_struct* p = current;        pr_info("[I] Current PID: %d\n", p->pid);        pr_info("            Name: %s\n", p->comm);}
module_init(my_proc_init);module_exit(my_proc_exit); Name: kswapd0[I] Current PID: 42 Name: cifsiod[I] Current PID: 43 Name: smb3decryptd[I] Current PID: 44 Name: cifsfileinfoput[I] Current PID: 45 Name: cifsoplockd[I] Current PID: 47 Name: acpi_thermal_pm[I] Current PID: 48```Name: kworker/u2:1[I] Current PID: 49 Name: khvcd[I] Current PID: 50 Name: kworker/0:2[I] Current PID: 51 Name: ipv6_addrconf[I] Current PID: 52 Name: kmemleak[I] Current PID: 53 Name: jbd2/vda-8[I] Current PID: 54 Name: ext4-rsv-conver[I] Current PID: 192 Name: udhcpc[I] Current PID: 203 Name: syslogd[I] Current PID: 206 Name: klogd[I] Current PID: 212 Name: getty[I] Current PID: 213 Name: sh[I] Current PID: 214 Name: getty[I] Current PID: 215 Name: getty[I] Current PID: 216 Name: getty[I] Current PID: 217 Name: getty[I] Current PID: 238 Name: insmod[I] Current PID: 242 Name: rmmod
Very spirited!
### Ex1. KDB
```bashecho hvc0 > /sys/module/kgdboc/parameters/kgdbocecho g > /proc/sysrq-trigger# Or use Ctrl+O g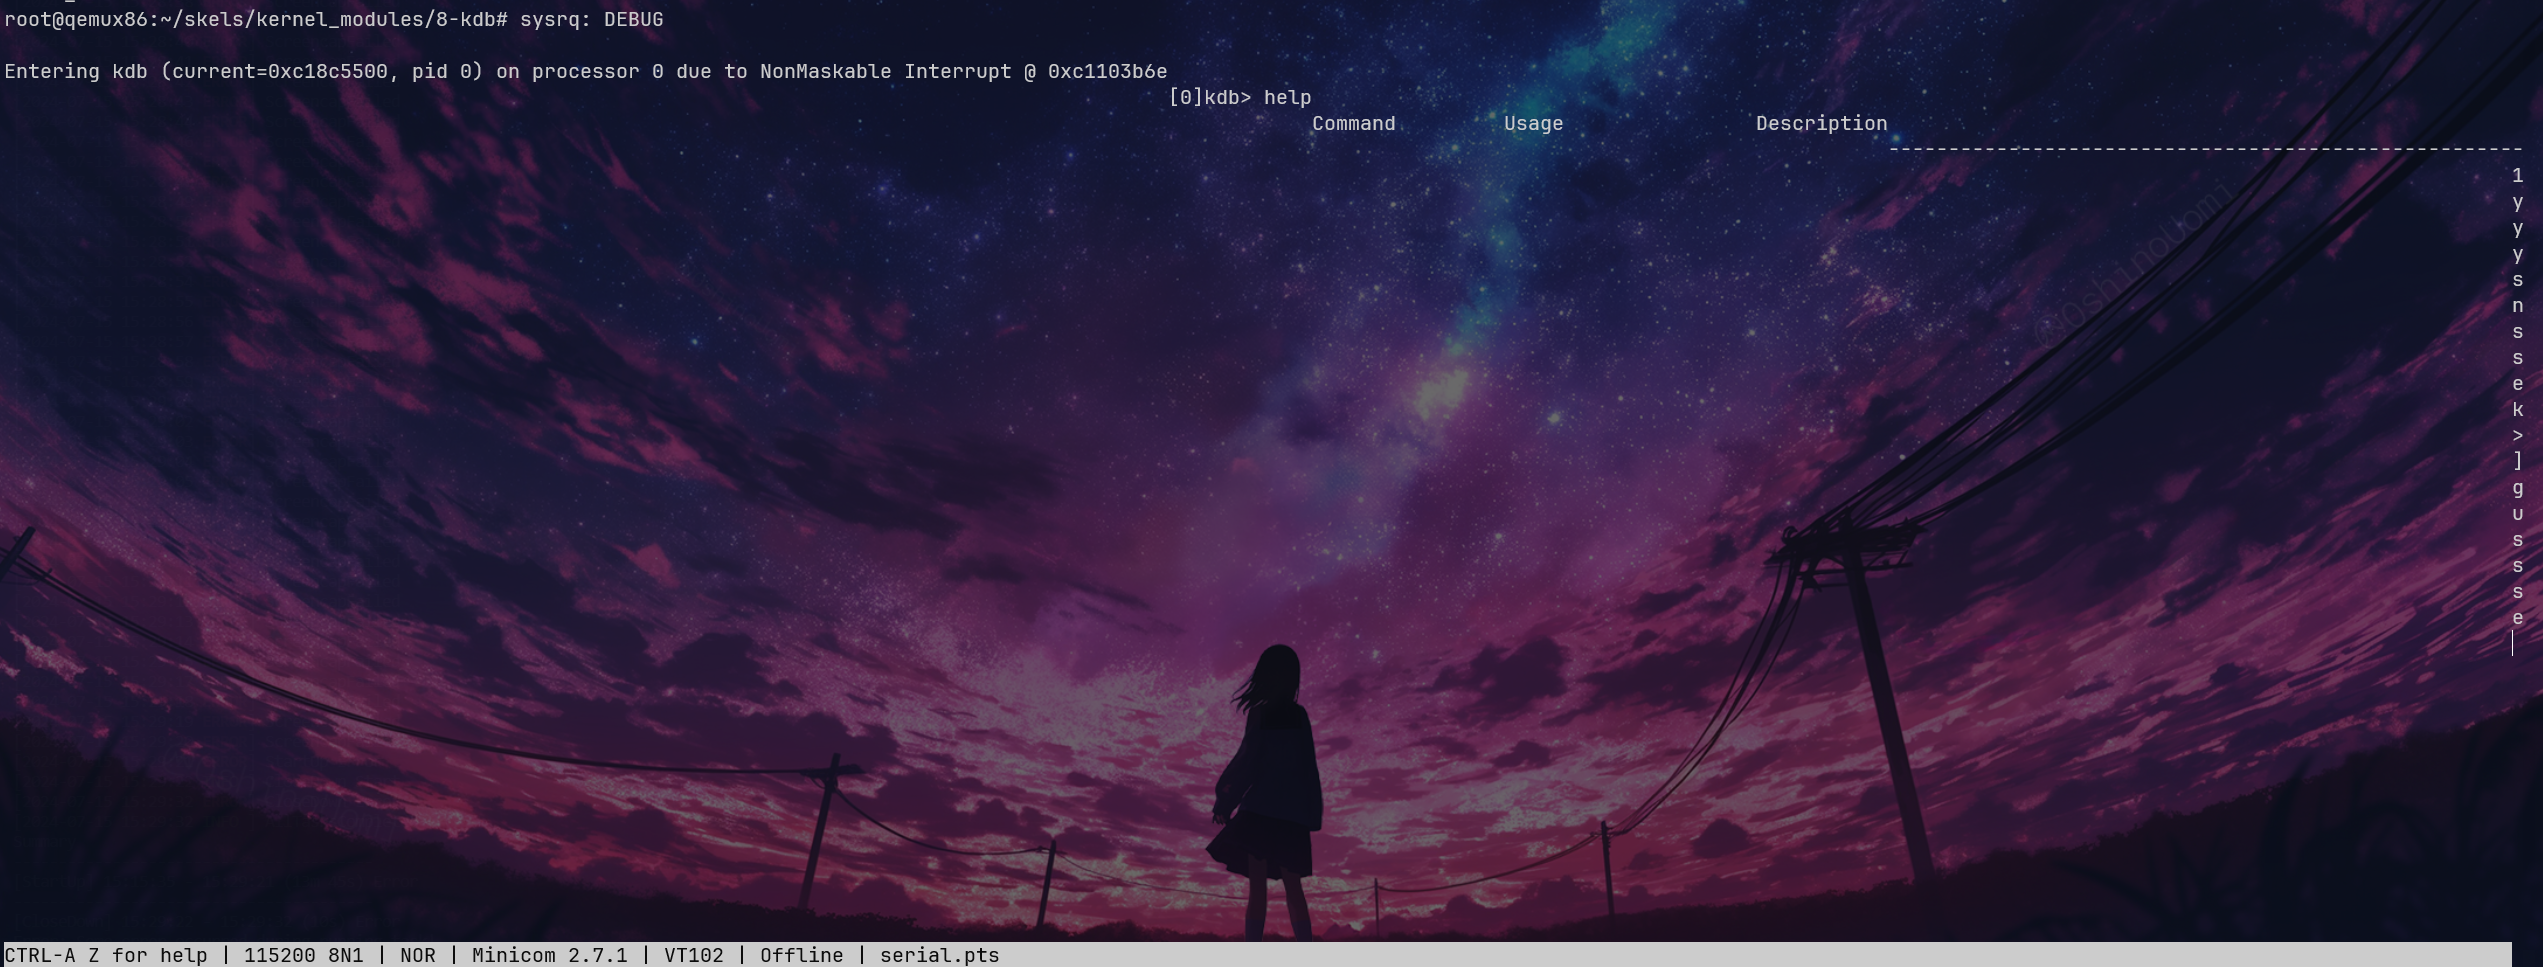
There’s a bug here, the display is incomplete, so it will be left as is.
Using echo to write into it directly enters the KDB.

From the stack trace using bt, we can see that there’s an issue at dummy_func1+0x8. We can also see current=0xc42b2b40, and with lsmod, we can find the base address 0xd0880000. However, when we use bt, we cannot see the backtrace stack, so it was left unresolved.
Next up is to use gdb add-symbol-file to import it, then set the base address and check the instructions. This is relatively straightforward, so we won’t delve into it.
Ex2. PS Module
The proc-info has been completed up to point 7.
Ex3. Memory Information
Create a kernel module that displays the virtual memory regions of the current process; for each memory region, it should show the start and end addresses.
Memory regions are represented by the struct vm_area_struct type, so we can start writing the kernel module.
#include <linux/module.h>#include <linux/init.h>#include <linux/kernel.h>
MODULE_AUTHOR("Muel Nova");MODULE_DESCRIPTION("SHOW MEM");MODULE_LICENSE("GPL");
static int mem_init(void) {        return 0;}
static void mem_exit(void) {}
module_init(mem_init);module_exit(mem_exit);ccflags-y = -Wno-unused-function -Wno-unused-label -Wno-unused-variable -DDEBUG
obj-m = proc.oThe framework looks something like this. Next, we need to look up how to use vm_area_struct. It is defined in include/linux/mm_types.h, so we can directly use vm_start and vm_end to represent size, and it is a linked list where vm_next can find the next one.
Therefore, we need to figure out how to find all the struct vm_area_struct structures for the current process. We can think of using current to find them, and looking through the code, we see that task_struct->mm is a pointer to an mm_struct structure. Continuing to look through mm_struct, the first field is the mmap field of struct vm_area_struct.
Thus, the final code:
#include <linux/module.h>#include <linux/init.h>#include <linux/kernel.h>#include <linux/sched.h>#include <linux/mm_types.h>
MODULE_AUTHOR("Muel Nova");MODULE_DESCRIPTION("SHOW MEM");MODULE_LICENSE("GPL");
static int mem_init(void) { struct task_struct* p = current; struct mm_struct* mm = p->mm; struct vm_area_struct* vma = mm->mmap; while (vma) { printk("0x%lx - 0x%lx\n", vma->vm_start, vma->vm_end); vma = vma->vm_next; } return 0;}root@qemux86:~/skels/kernel_modules/10-proc# insmod proc.koproc: loading out-of-tree module taints kernel.0x8048000 - 0x80c20000x80c2000 - 0x80c30000x80c3000 - 0x80c40000x80c4000 - 0x80c60000x84c9000 - 0x84ea0000x4480c000 - 0x4482e0000x4482e000 - 0x4482f0000x4482f000 - 0x448300000x44832000 - 0x449a90000x449a9000 - 0x449ab0000x449ab000 - 0x449ac0000x449ac000 - 0x449af0000x449b1000 - 0x44a090000x44a09000 - 0x44a0a0000x44a0a000 - 0x44a0b0000xb7f28000 - 0xb7f4d0000xb7f4d000 - 0xb7f510000xb7f51000 - 0xb7f530000xbffcc000 - 0xbffed000Ex4. Dynamic Debugging
First, mount debugfs:
mkdir /debugmount -t debugfs none /debugThen I couldn’t find /debug/dynamic_debug, probably because the kernel feature wasn’t enabled, so I skipped it.
Kernel API
0. Introduction
Find the definitions of the following symbols in the Linux kernel:
-
struct list_head: It appears to be a doubly linked list.struct list_head {struct list_head *next, *prev;}; -
INIT_LIST_HEAD(): Initializes a list head.static inline void INIT_LIST_HEAD(struct list_head *list){WRITE_ONCE(list->next, list);WRITE_ONCE(list->prev, list);} -
list_add(): Insertsnewbetweenprevandnext. Here,WRITE_ONCEis used for process safety and to ensure ordering.static inline void __list_add(struct list_head *new,struct list_head *prev,struct list_head *next){if (!__list_add_valid(new, prev, next))return;next->prev = new;new->next = next;new->prev = prev;WRITE_ONCE(prev->next, new);} -
list_for_each: A loop wrapper./*** list_for_each - iterate over a list* @pos: the &struct list_head to use as a loop cursor.* @head: the head for your list.*/#define list_for_each(pos, head) \for (pos = (head)->next; !list_is_head(pos, (head)); pos = pos->next) -
list_entry -
/*** list_entry - get the struct for this entry* @ptr: the &struct list_head pointer.* @type: the type of the struct this is embedded in.* @member: the name of the list_head within the struct.*/#define list_entry(ptr, type, member) \container_of(ptr, type, member)
-
container_ofMore complex, but essentially takes a known
ptrof typemember, knowing it belongs to sometypestructure, and finds the pointer to thetypestructure./*** container_of - cast a member of a structure out to the containing structure* @ptr: the pointer to the member.* @type: the type of the container struct this is embedded in.* @member: the name of the member within the struct.** WARNING: any const qualifier of @ptr is lost.*/#define container_of(ptr, type, member) ({ \void *__mptr = (void *)(ptr); \static_assert(__same_type(*(ptr), ((type *)0)->member) || \__same_type(*(ptr), void), \"pointer type mismatch in container_of()"); \((type *)(__mptr - offsetof(type, member))); }) -
offsetof -
Literally. It’s a wrapper.
#undef offsetof#define offsetof(TYPE, MEMBER) __builtin_offsetof(TYPE, MEMBER)
1. Memory Allocation in the Linux Kernel
Generate a task skeleton named 1-mem and browse the contents of the mem.c file. Observe the use of the kmalloc() function for memory allocation.
- Compile the source code and load the
mem.komodule using insmod.- View kernel messages using the dmesg command.
- Unload the kernel module using the rmmod mem command.
mem = kmalloc(4096 * sizeof(*mem), GFP_KERNEL);It allocated 4K characters of buffer.
Printing them all shows ‘Z’, which is 90, or 0x5a, mysterious.
2. Sleeping in Atomic Context
Generate a task skeleton named 2-sched-spin and browse the contents of the sched-spin.c file.
- Compile the source code and load the module (using commands make build and make copy).
- Note: There needs to be a 5-second wait before the insertion sequence completes.
- Unload the kernel module.
- Find the line marked
TODO 0to create an atomic section. Recompile the source code and reload the module into the kernel.
You should now encounter an error. Look at the stack trace. What is the cause of the error?
Initially, it’s a preemptible kernel. What we need to do is change schedule_timeout to be atomic.
  spin_lock(&lock);
  set_current_state(TASK_INTERRUPTIBLE);  /* Try to sleep for 5 seconds. */  schedule_timeout(5 * HZ);
  spin_unlock(&lock);
Unquestionably, this results in an error:
root@qemux86:~/skels/kernel_api/2-sched-spin# insmod sched-spin.kosched_spin: loading out-of-tree module taints kernel.BUG: scheduling while atomic: insmod/322/0x00000002 1 lock held by insmod/322:This is because schedule is not allowed in an atomic section.
3. Using Kernel Memory
Generate a skeleton for a task named 3-memory and browse the contents of the memory.c file. Pay attention to the comments marked with TODO. You need to allocate 4 structures of type struct task_info and initialize them (in memory_init()), then print and release them (in memory_exit()).
-
(TODO 1) Allocate memory for the
struct task_infostructure and initialize its fields:- Set the
pidfield to the PID value passed as a parameter; - Set the
timestampfield to the value of thejiffiesvariable, which stores the number of ticks since system boot.
- Set the
-
(TODO 2) Allocate memory for the current process, parent process, next process, andNext processes are allocated
struct task_info, and the following information is obtained:- The PID of the current process, which can be retrieved from the
struct task_structstructure returned by thecurrentmacro.
Search for relevant fields in the
struct task_structstructure. Look for “parent”.- The PID of the next process in the process list relative to the current process.
Call the
next_taskmacro twice. - The PID of the current process, which can be retrieved from the
-
(TODO 3) Display these four structures.
- Use
printk()to display their two fields:pidandtimestamp.
- Use
-
(TODO 4) Release the memory occupied by the structures (using
kfree()).
TODO1
#include <linux/jiffies.h>
static struct task_info *task_info_alloc(int pid){  struct task_info *ti;
  /* TODO 1: allocate and initialize a task_info struct */  ti = kmalloc(sizeof(struct task_info), GFP_KERNEL);    if (ti == NULL)    return NULL;  ti->pid = pid;  ti->timestamp = jiffies;
  return ti;}
TODO2
static int memory_init(void){  struct task_struct* cur = get_current();  ti1 = task_info_alloc(cur->pid);  ti2 = task_info_alloc(cur->parent->pid);  ti3 = task_info_alloc(next_task(cur)->pid);  ti4 = task_info_alloc(next_task(next_task(cur))->pid);
  /* TODO 2: call task_info_alloc for current pid */
  /* TODO 2: call task_info_alloc for parent PID */
  /* TODO 2: call task_info alloc for next process PID */
  /* TODO 2: call task_info_alloc for next process of the next process */
  return 0;}
TODO3,4
static void memory_exit(void){
  /* TODO 3: print ti* field values */  printk("[task_info] Current:\n\tPID:%d\n\ttimestamp:%lu\n\n", ti1->pid, ti1->timestamp);  printk("[task_info] Parent:\n\tPID:%d\n\ttimestamp:%lu\n\n", ti2->pid, ti2->timestamp);  printk("[task_info] Next:\n\tPID:%d\n\ttimestamp:%lu\n\n", ti3->pid, ti3->timestamp);  printk("[task_info] Next(Next):\n\tPID:%d\n\ttimestamp:%lu\n", ti4->pid, ti4->timestamp);
/* TODO 4: free ti* structures */ kfree(ti1); kfree(ti2); kfree(ti3); kfree(ti4);}root@qemux86:~/skels/kernel_api/3-memory# rmmod memory.ko[task_info] Current: PID:241 timestamp:4294910496 [task_info] Parent: PID:213 timestamp:4294910496 [task_info] Next: PID:0 timestamp:4294910496 [task_info] Next(Next): PID:1 timestamp:4294910496root@qemux86:~/skels/kernel_api/3-memory# insmod memory.koroot@qemux86:~/skels/kernel_api/3-memory# rmmod memory.ko[task_info] Current: PID:245 timestamp:4294912218 [task_info] Parent: PID:213 timestamp:4294912218 [task_info] Next: PID:0 timestamp:4294912218 [task_info] Next(Next): PID:1 timestamp:4294912218That’s correct.
4. Using Kernel Lists
Generate a skeleton named 4-list. Browse the contents of the list.c file and note the comments labeled TODO. The current process will add the four structures from the previous exercises to the list. The list will be constructed in the task_info_add_for_current() function when the module is loaded. The list will be printed and deleted in the list_exit() function and the task_info_purge_list() function.
- (TODO 1) Complete the
task_info_add_to_list()function, which allocates astruct task_infoand adds it to the list.- (TODO 2) Complete the
task_info_purge_list()function, which deletes all elements from the list.- Compile the kernel module. Load and unload the module according to the messages displayed by the kernel.
It’s like turning the previous one into a list, just write something.
TODO1
static void task_info_add_to_list(int pid){  struct task_info *ti;
  /* TODO 1: Allocate task_info and add it to list */  ti = task_info_alloc(pid);  if (ti == NULL)    return;  list_add(&ti->list, &head);}
TODO2
Note that this is about deleting, so we need a nxt to store the next element.
static void task_info_purge_list(void){  struct list_head *p, *q;  struct task_info *ti;
  /* TODO 2: Iterate over the list and delete all elements */  list_for_each_safe(p, q, &head) {    ti = list_entry(p, struct task_info, list);    list_del(p);    kfree(ti);  }}
No issues.
root@qemux86:~/skels/kernel_api/4-list# rmmod list.kobefore exiting: [(1, 66185)(0, 66185)(213, 66185)(296, 66185)]5. Using Kernel Lists for Process Handling
Generate a skeleton named 5-list-full. Browse the contents of the list-full.c file and note the comments labeled TODO. In addition to the functionality of 4-list, we have added the following:
-
A
countfield, showing how many times a process has been “added” to the list. -
If a process is “added” multiple times, no new entry is created in the list but:
- The
timestampfield is updated. - The
countis incremented.
- The
-
To implement the counter feature, add a
task_info_find_pid()function to search for a pid in the existing list. -
If found, return a reference to the
task_infostructure. Otherwise, returnNULL. -
Expiry handling. If a process has been in the list for more than 3 seconds and its
countis not greater than 5, it is considered expired and removed from the list. -
The expiry handling feature has already been implemented in the
task_info_remove_expired()function.
-
(TODO 1) Implement the
task_info_find_pid()function. -
(TODO 2) Change the fields of an item in the list so that it does not expire. It should not meet any of the expiry conditions in the
task_info_remove_expired()function. -
Compile, copy, load, and unload the kernel module, following the displayed messages. Loading the kernel module takes some time because the
schedule_timeout()function callssleep().
This traversal is also straightforward, just scan the linked list once. The second part is given as a hint, setting count to 5.
TODO1
static struct task_info *task_info_find_pid(int pid){  struct list_head *p;  struct task_info *ti;
  /* TODO 1: Look for pid and return task_info or NULL if not found */  list_for_each(p, &head) {    ti = list_entry(p, struct task_info, list);    if (ti->pid == pid)      return ti;  }
  return NULL;}
TODO2
static void list_full_exit(void){  struct task_info *ti;
  /* TODO 2: Ensure that at least one task is not deleted */
  ti = list_entry(head.next, struct task_info, list);
  atomic_set(&ti->count, 5);  task_info_print_list("after removing expired");  task_info_remove_expired();  task_info_print_list("after removing expired");  task_info_purge_list();}
We kept one alive, which is next next.
root@qemux86:~/skels/kernel_api/5-list-full# insmod list-full.kolist_full: loading out-of-tree module taints kernel.after first add: [(1, 4294915575)(0, 4294915575)(214, 4294915575)(243, 4294915575)]
root@qemux86:~/skels/kernel_api/5-list-full# rmmod list-full.koafter removing expired: [(1, 4294915575)]
6. Synchronizing List Operations
Generate a skeleton for a task named 6-list-sync.
- Browse the code and find the
TODO 1string.- Use a spinlock or read-write lock to synchronize access to the list.
- Compile, load, and unload the kernel module.
:::tip Important
Always lock data, not code!
:::
And here comes my favorite concurrency programming section.
/* * Linux API lab * * list-sync.c - Synchronize access to a list */
#include <linux/spinlock.h>#include <linux/module.h>#include <linux/init.h>#include <linux/kernel.h>#include <linux/slab.h>#include <linux/list.h>#include <linux/sched/signal.h>
MODULE_DESCRIPTION("Full list processing with synchronization");MODULE_AUTHOR("SO2");MODULE_LICENSE("GPL");
struct task_info {  pid_t pid;  unsigned long timestamp;  atomic_t count;  struct list_head list;};
static struct list_head head;
/* TODO 1: you can use either a spinlock or rwlock, define it here */// Write mutex, read parallel, no issues guys.DEFINE_RWLOCK(lock);
static struct task_info *task_info_alloc(int pid){  struct task_info *ti;
  ti = kmalloc(sizeof(*ti), GFP_KERNEL);  if (ti == NULL)    return NULL;  ti->p```id = pid;  ti->timestamp = jiffies;  atomic_set(&ti->count, 0);
  return ti;}
static struct task_info *task_info_find_pid(int pid){  struct list_head *p;  struct task_info *ti;
  list_for_each(p, &head) {    ti = list_entry(p, struct task_info, list);    if (ti->pid == pid) {      return ti;    }  }
  return NULL;}
static void task_info_add_to_list(int pid){  struct task_info *ti;
  /* TODO 1: Protect list, is this read or write access? */    // find_pid reads, so we take a read lock  read_lock(&lock);  ti = task_info_find_pid(pid);  if (ti != NULL) {         // Note here, if found, unlock read lock first, prepare to write. Wait until all reads are unlocked before writing.    read_unlock(&lock);         write_lock(&lock);    ti->timestamp = jiffies;    atomic_inc(&ti->count);         write_unlock(&lock);    /* TODO: Guess why this comment was added here */
    return;  }  read_unlock(&lock);
  /* TODO 1: critical section ends here */
  ti = task_info_alloc(pid);  // Note here, alloc because of the GFP_KERNEL flag, is preemptible, we cannot take the lock in the previous line!!  write_lock(&lock);  /* TODO 1: protect list access, is this read or write access? */  list_add(&ti->list, &head);  write_unlock(&lock);  /* TODO 1: critical section ends here */}
void task_info_add_for_current(void){  task_info_add_to_list(current->pid);  task_info_add_to_list(current->parent->pid);  task_info_add_to_list(next_task(current)->pid);  task_info_add_to_list(next_task(next_task(current))->pid);}/* TODO 2: Export the kernel symbol */EXPORT_SYMBOL(task_info_add_for_current);
void task_info_print_list(const char *msg){  struct list_head *p;  struct task_info *ti;
  pr_info("%s: [ ", msg);
  /* TODO 1: Protect list, is this read or write access? */    // No need to put this inside the loop, taking the lock is expensive  read_lock(&lock);  list_for_each(p, &head) {
    ti = list_entry(p, struct task_info, list);    pr_info("(%d, %lu) ", ti->pid, ti->timestamp);
  }    read_unlock(&lock);
  /* TODO 1: Critical section ends here */  pr_info("]\n");}/* TODO 2: Export the kernel symbol */EXPORT_SYMBOL(task_info_print_list);
void task_info_remove_expired(void){  struct list_head *p, *q;  struct task_info *ti;
  /* TODO 1: Protect list, is this read or write access? */    // list_del is a write operation, we can directly take the write lock, no need to take the read lock and then the write lock.  write_lock(&lock);  list_for_each_safe(p, q, &head) {    ti = list_entry(p, struct task_info, list);    if (jiffies - ti->timestamp > 3 * HZ && atomic_read(&ti->count) < 5) {      list_del(p);      kfree(ti);    }  }  write_unlock(&lock);  /* TODO 1: Critical section ends here */}/* TODO 2: Export the kernel symbol */EXPORT_SYMBOL(task_info_remove_expired);
static void task_info_purge_list(void){  struct list_head *p, *q;  struct task_info *ti;
  /* TODO 1: Protect list, is this read or write access? */    // Write operation  write_lock(&lock);  list_for_each_safe(p, q, &head) {    ti = list_entry(p, struct task_info, list);    list_del(p);    kfree(ti);  }  write_unlock(&lock);  /* TODO 1: Critical sections ends here */}
static int list_sync_init(void){  INIT_LIST_HEAD(&head);
  task_info_add_for_current();  task_info_print_list("after first add");
  set_current_state(TASK_INTERRUPTIBLE);  schedule_timeout(5 * HZ);
  return 0;}
static void list_sync_exit(void){  struct task_info *ti;
  ti = list_entry(head.prev, struct task_info, list);  atomic_set(&ti->count, 10);
  task_info_remove_expired();  task_info_print_list("after removing expired");  task_info_purge_list();}
module_init(list_sync_init);module_exit(list_sync_exit);
7. Testing Module Calls in Our List Module
Generate the skeleton for a task named 7-list-test and browse through the content of the list-test.c file. We will use it as a test module. It will call functions exported by the 6-list-sync task. In the list-test.c file, the exported functions have already been marked with extern.
Uncomment the code in 7-list-test.c. Look for TODO 1.
To export the above functions from the module located in the 6-list-sync/ directory, you need to follow these steps:
- The function must not be static.
- Use the
EXPORT_SYMBOLmacro to export the kernel symbol. For example:EXPORT_SYMBOL(task_info_remove_expired);. This macro should be used after the function definition. Browse the code and look for theTODO 2string inlist-sync.c.- Remove the code in the 6-list-sync module that prevents list items from expiring (it contradicts our exercise).
- Compile and load the module in
6-list-sync/. Once loaded, it exposes the exported functions, making them available for use by the test module. You can check this by searching for the function name in/proc/kallsymsboth before and after loading the module.- Compile the test module, then load it.
- Use the lsmod command to check whether both modules are loaded. What do you notice?
- Unload the kernel test module.
What should the order of unloading the two modules (from the 6-list-sync module and the test module) be? What would happen if another order were used?
There’s not much to say about this; it’s just a test.
-
list_test 16384 0 - Live 0xd0896000 (O)list_sync 16384 1 list_test, Live 0xd086c000 (O)
The order should definitely be sync first, then test, and the unloading order should be reversed. Otherwise, it would be undefined.
End, Kernel API
Character Device Drivers
Now we’re at my favorite topic, where I can jot down some notes. We all know that Linux uses special device files to access hardware devices, and the operating system redirects system calls targeting these files to the associated device drivers.
Classification and Identification
We can classify devices into two categories based on their rate, capacity, and how data is organized: character devices and block devices.
- For character devices, they handle small amounts of data and don’t require frequent searches of the data. Examples include keyboards and mice. Typically, reading and writing to these devices is performed sequentially byte by byte.
- For block devices, they handle large amounts of data, such as hard disks and RAM. It’s quite clear.
Linux provides different APIs for the two types of devices. If it’s a character device, the system call is passed directly to the device driver; if it’s a block device, interaction occurs through the file system and the block device subsystem (presumably for performance reasons, such as DMA).
Devices are generally identified using <major device number><minor device number> format, where the major device number typically identifies the device type, and the minor device number pertains to the device itself. An example is hda1, hda2, ttyS0, ttyS1.
❯ ls -la /dev/tty?crw--w---- 1 root tty 4, 0 Jul 24 18:25 /dev/tty0crw--w---- 1 root tty 4, 1 Jul 24 18:25 /dev/tty1crw--w---- 1 root tty 4, 2 Jul 24 18:25 /dev/tty2crw--w---- 1 root tty 4, 3 Jul 24 18:25 /dev/tty3crw--w---- 1 root tty 4, 4 Jul 24 18:25 /dev/tty4crw--w---- 1 root tty 4, 5 Jul 24 18:25 /dev/tty5crw--w---- 1 root tty 4, 6 Jul 24 18:25 /dev/tty6crw--w---- 1 root tty 4, 7 Jul 24 18:25 /dev/tty7crw--w---- 1 root tty 4, 8 Jul 24 18:25 /dev/tty8crw--w---- 1 root tty 4, 9 Jul 24 18:25 /dev/tty9You can see that the first character is c, representing a char dev, while naturally, block devices start with b. Here, the major device number is 4, and the minor device numbers increment sequentially.
Creating a Device
We can create a new device using the mknod command, which also requires providing parameters such as the name, type, major device number, and minor device number. A simple example creates a character device named muelnova with a major device number of 114 and a minor device number of 514.
[root@MuelNova-Laptop nova]# mknod /dev/muelnova c 114 514[root@MuelNova-Laptop nova]# ls -la /dev/muelnovacrw-r--r-- 1 root root 114, 514 Jul 24 19:03 /dev/muelnovaThe kernel uses the struct cdev to register character devices. Generally, the driver also utilizes several structures:
-
struct file_operations: Implements file-specific system calls, such asopen,close,read,mmap, etc.struct file_operations {struct module *owner;loff_t (*llseek) (struct file *, loff_t, int);ssize_t (*read) (struct file *, char __user *, size_t, loff_t *);ssize_t (*write) (struct file *, const char __user *, size_t, loff_t *);[...]long (*unlocked_ioctl) (struct file *, unsigned int, unsigned long);[...]int (*open) (struct inode *, struct file *);int (*flush) (struct file *, fl_owner_t id);int (*release) (struct inode *, struct file *);[...]You can notice that these functions have additional parameters uncommon in user space, such as
struct fileandstruct inode.Simply put, file and inode are somewhat like the difference between a process and a program. Files have state, while inodes only include some static information.
-
struct file: Contains open flags, associated operations, etc.struct file {union {/* fput() uses task work when closing and freeing file (default). */struct callback_head f_task_work;/* fput() must use workqueue (most kernel threads). */struct llist_node f_llist;unsigned int f_iocb_flags;};/** Protects f_ep, f_flags.* Must not be taken from IRQ context.*/spinlock_t f_lock;fmode_t f_mode;atomic_long_t f_count;struct mutex f_pos_lock;loff_t f_pos;unsigned int f_flags;struct fown_struct f_owner;const struct cred *f_cred;struct file_ra_state f_ra;struct path f_path;struct inode *f_inode; /* cached value */const struct file_operations *f_op;u64 f_version;#ifdef CONFIG_SECURITYvoid *f_security;#endif/* needed for tty driver, and maybe others */void *private_data;#ifdef CONFIG_EPOLL/* Used by fs/eventpoll.c to link all the hooks to this file */struct hlist_head *f_ep;#endif /* #ifdef CONFIG_EPOLL */struct address_space *f_mapping;errseq_t f_wb_err;errseq_t f_sb_err; /* for syncfs */} __randomize_layout__attribute__((aligned(4))); /* lest something weird decides that 2 is OK */ -
struct inode: Includes many fields, such asi_cdev, which points to a pointer defining the character device structure.struct inode {umode_t i_mode;unsi```cshort i_opflags;kuid_t i_uid;kgid_t i_gid;unsigned int i_flags;
#ifdef CONFIG_FS_POSIX_ACL struct posix_acl *i_acl; struct posix_acl *i_default_acl; #endif
const struct inode_operations *i_op;struct super_block *i_sb;struct address_space *i_mapping;#ifdef CONFIG_SECURITY void *i_security; #endif
/* Stat data, not accessed from path walking */unsigned long    i_ino;
/* * Filesystems may only read i_nlink directly.  They shall use the * following functions for modification: * *    (set|clear|inc|drop)_nlink *    inode_(inc|dec)_link_count */union {  const unsigned int i_nlink;  unsigned int __i_nlink;};dev_t      i_rdev;loff_t      i_size;struct timespec64  __i_atime;struct timespec64  __i_mtime;struct timespec64  __i_ctime; /* use inode_*_ctime accessors! */spinlock_t    i_lock;  /* i_blocks, i_bytes, maybe i_size */unsigned short          i_bytes;u8      i_blkbits;enum rw_hint    i_write_hint;blkcnt_t    i_blocks;
#ifdef __NEED_I_SIZE_ORDERED seqcount_t i_size_seqcount; #endif
/* Misc */unsigned long    i_state;struct rw_semaphore  i_rwsem;
unsigned long    dirtied_when;  /* jiffies of first dirtying */unsigned long    dirtied_time_when;
struct hlist_node  i_hash;struct list_head  i_io_list;  /* backing dev IO list */
#ifdef CONFIGCGROUP_WRITEBACK struct bdi_writeback _i_wb; / the associated cgroup wb */
/* foreign inode detection, see wbc_detach_inode() */int i_wb_frn_winner;u16 i_wb_frn_avg_time;u16 i_wb_frn_history;#endif struct listhead i_lru; / inode LRU list / struct list_head i_sb_list; struct list_head i_wb_list; / backing dev writeback list / union { struct hlist_head i_dentry; struct rcu_head i_rcu; }; atomic64_t i_version; atomic64_t i_sequence; / see futex / atomic_t i_count; atomic_t i_dio_count; atomic_t i_writecount; #if defined(CONFIG_IMA) || defined(CONFIG_FILE_LOCKING) atomic_t i_readcount; / struct files open RO / #endif union { const struct file_operations _i_fop; / former ->i_op->default_file_ops */ void (*free_inode)(struct inode *); }; struct file_lock_context *i_flctx; struct address_space i_data; struct list_head i_devices; union { struct pipe_inode_info *i_pipe; struct cdev *i_cdev; char *i_link; unsigned i_dir_seq; };
__u32 i_generation;#ifdef CONFIGFSNOTIFY **u32 i_fsnotify_mask; / all events this inode cares about _/ struct fsnotify_mark_connector **rcu *i_fsnotify_marks; #endif
#ifdef CONFIG_FS_ENCRYPTION struct fscrypt_inode_info *i_crypt_info; #endif
#ifdef CONFIG_FS_VERITY struct fsverity_info *i_verity_info; #endif
void *i_private; /* fs or device private pointer */} __randomize_layout;
### 0. Introduction
Use [LXR](http://elixir.free-electrons.com/linux/latest/source) to find the definitions of the following symbols in the Linux kernel:
  > - `struct file`  > - `struct file_operations`  > - `generic_ro_fops`  > - `vfs_read()`
We've looked at the first two already, now let's examine `generic_ro_fops` and `vfs_read`.
```cconst struct file_operations generic_ro_fops = {  .llseek    = generic_file_llseek,  .read_iter  = generic_file_read_iter,  .mmap    = generic_file_readonly_mmap,  .splice_read  = filemap_splice_read,};
This clearly defines a generic readonly file operations structure.
ssize_t vfs_read(struct file *file, char __user *buf, size_t count, loff_t *pos){  ssize_t ret;
  if (!(file->f_mode & FMODE_READ))    return -EBADF;  if (!(file->f_mode & FMODE_CAN_READ))    return -EINVAL;  if (unlikely(!access_ok(buf, count)))    return -EFAULT;
  ret = rw_verify_area(READ, file, pos, count);  if (ret)    return ret;  if (count > MAX_RW_COUNT)    count =  MAX_RW_COUNT;
  if (file->f_op->read)    ret = file->f_op->read(file, buf, count, pos);  else if (file->f_op->read_iter)    ret = new_sync_read(file, buf, count, pos);  else    ret = -EINVAL;  if (ret > 0) {    fsnotify_access(file);    add_rchar(current, ret);  }  inc_syscr(current);  return ret;}
This function first checks whether we have permission to read, then verifies that we can read count bytes starting from the current position in the file. It then attempts to read using different methods. After reading, it notifies of the access, updates the counter (current + ret), and increments the system call counter.
1. Registration/Unregistration 
The driver controls a device with the MY_MAJOR major device number and MY_MINOR minor device number (these macros are defined in the kernel/so2_cdev.c file).
-
Use mknod to create the /dev/so2_cdev character device node.
-
Implement the registration and unregistration of the device in the module’s init and exit functions, with the device name being
so2_cdev. Implement TODO 1. -
Use the
pr_infofunction to display a message after registration and unregistration operations to confirm their success. Then load the module into the kernel:
$ insmod so2_cdev.koAnd view the character devices in /proc/devices:
$ cat /proc/devices | lessIdentify the device type registered with major device number 42. Note that /proc/devices contains only device types (major device numbers) and not actual devices (minor device numbers).
- Unload the kernel module:
rmmod so2_cdevObserving the so2_cdev.c file, we see that it is 42,0, so let’s create one:
root@qemux86:~/.ash_history/kernel# mknod /dev/so2_cdev c 42 0TODO 1
static int so2_cdev_init(void){  int err;  int i;
  /* TODO 1: register char device region for MY_MAJOR and NUM_MINORS starting at MY_MINOR */  register_chrdev_region(MKDEV(MY_MAJOR, MY_MINOR), NUM_MINORS, MODULE_NAME);
  for (i = 0; i < NUM_MINORS; i++) {#ifdef EXTRA    /* TODO 7: extra tasks, for home */#else    /*TODO 4: initialize buffer with MESSAGE string */    /* TODO 3: set access variable to 0, use atomic_set */#endif    /* TODO 7: extra tasks for home */    /* TODO 2: init and add cdev to kernel core */  }
  return 0;}
static void so2_cdev_exit(void){  int i;
  for (i = 0; i < NUM_MINORS; i++) {    /* TODO 2: delete cdev from kernel core */  }
  /* TODO 1: unregister char device region, for MY_MAJOR and NUM_MINORS starting at MY_MINOR */  unregister_chrdev_region(MKDEV(MY_MAJOR, MY_MINOR), NUM_MINORS);}
Adding pr_info is simple, but for some reason, when I wrote it in reverse order, there was no output on the first insmod, and it prompted “Register” on the first rmmod. It’s mysterious.
pr_info("WHOW, YOU unREGISTERED %d DEVICES!!!!", NUM_MINORS);root@qemux86:~/.ash_history/kernel# insmod so2_cdev.koWHOW, YOU unREGISTERED 1 DEVICES!!!!root@qemux86:~/.ash_history/kernel# rmmod so2_cdev.koWHOW, YOU REGISTERED 1 DEVICES!!!!2. Registering an Already Registered Major Device Number 
Modify MY_MAJOR to point to a major device number that is already in use.
Hint
View /proc/devices to get an allocated major device number.
Refer to errno-base.h and find out the meaning of error codes. Restore the initial configuration of the module.
root@qemux86:~/.ash_history/kernel# cat /proc/devicesCharacter devices: 1 mem 2 pty 3 ttyp 4 /dev/vc/0 4 tty 5 /dev/tty 5 /dev/console 5 /dev/ptmx 7 vcs 10 misc 13 input128 ptm136 pts229 hvc253 virtio-portsdev254 bsgLet’s try changing it to 4. There was no error message, but it turns out we didn’t handle the error. Change it like this:
err = register_chrdev_region(MKDEV(MY_MAJOR, MY_MINOR), NUM_MINORS, MODULE_NAME); if (err < 0) { pr_err("Failed to register char device: %d", err); return err; } pr_info("WHOW, YOU REGISTERED %d DEVICES!!!!", NUM_MINORS);There’s an error message now: insmod: can't insert 'so2_cdev.ko': Device or resource busy
3. Opening and Closing 
Run cat /dev/so2_cdev to read data from our character device. Since the driver does not implement an open function, the read operation does not work properly. Follow the comments marked as TODO 2 and implement the following:
- Initialize the device.
- Implement the open and release functions in the driver.
- Display a message in the open and release functions.
- Read the
/dev/so2_cdevfile again. Follow the messages displayed by the kernel. The error will still occur since thereadfunction has not been implemented yet.
cdev is of type struct cdev, not a pointer.
struct so2_device_data {  /* TODO 2: add cdev member */  struct cdev cdev;  /* TODO 4: add buffer with BUFSIZ elements */  /* TODO 7: extra members for home */  /* TODO 3: add atomic```c/* Character device drivers lab * * All tasks */
#include <asm/atomic.h>#include <linux/module.h>#include <linux/init.h>#include <linux/kernel.h>#include <linux/fs.h>#include <linux/cdev.h>#include <linux/uaccess.h>#include <linux/sched.h>#include <linux/wait.h>
#include "../include/so2_cdev.h"
MODULE_DESCRIPTION("SO2 character device");MODULE_AUTHOR("SO2");MODULE_LICENSE("GPL");
#define LOG_LEVEL KERN_INFO
#define MY_MAJOR 42#define MY_MINOR 0#define NUM_MINORS 1#define MODULE_NAME "so2_cdev"#define MESSAGE "hello\n"#define IOCTL_MESSAGE "Hello ioctl"
#ifndef BUFSIZ#define BUFSIZ 4096#endif

struct so2_device_data {    /* TODO 2: add cdev member */    struct cdev cdev;    /* TODO 4: add buffer with BUFSIZ elements */    char buffer[BUFSIZ];    /* TODO 7: extra members for home */    /* TODO 3: add atomic_t access variable to keep track if file is opened */    atomic_t access;};
struct so2_device_data devs[NUM_MINORS];
static int so2_cdev_open(struct inode *inode, struct file *file){    struct so2_device_data *data;
    /* TODO 2: print message when the device file is open. */    pr_info("Whow, the device file is open!!!!");
    /* TODO 3: inode->i_cdev contains our cdev struct, use container_of to obtain a pointer to so2_device_data */    data = container_of(inode->i_cdev, struct so2_device_data, cdev);
    file->private_data = data;
#ifndef EXTRA    /* TODO 3: return immediately if access is != 0, use atomic_cmpxchg */    if (atomic_cmpxchg(&data->access, 0, 1) != 0) {        pr_info("I'm using the device!!!!");        return -EBUSY;    }#endif
    set_current_state(TASK_INTERRUPTIBLE);    schedule_timeout(10 * HZ);
    return 0;}
static intso2_cdev_release(struct inode *inode, struct file *file){    /* TODO 2: print message when the device file is closed. */    pr_info("No!!! You closed the device, you evil!");
#ifndef EXTRA    struct so2_device_data *data =        (struct so2_device_data *) file->private_data;
    /* TODO 3: reset access variable to 0, use atomic_set */    atomic_set(&data->access, 0);#endif    return 0;}
static ssize_tso2_cdev_read(struct file *file,              char __user *user_buffer,              size_t size, loff_t *offset){    struct so2_device_data *data =        (struct so2_device_data *) file->private_data;    size_t to_read;
#ifdef EXTRA    /* TODO 7: extra tasks for home */#endif
    /* TODO 4: Copy data->buffer to user_buffer, use copy_to_user */    to_read = min(size, (size_t)(BUFSIZ - *offset));    if (to_read > 0) {        if (copy_to_user(user_buffer, data->buffer + *offset, to_read)) {            return -EFAULT;        }        *offset += to_read;    }
    return to_read;}
static ssize_tso2_cdev_write(struct file *file,               const char __user *user_buffer,               size_t size, loff_t *offset){    struct so2_device_data *data =        (struct so2_device_data *) file->private_data;

    /* TODO 5: copy user_buffer to data->buffer, use copy_from_user */    /* TODO 7: extra tasks for home */
    return size;}
static longso2_cdev_ioctl(struct file *file, unsigned int cmd, unsigned long arg){    struct so2_device_data *data =        (struct so2_device_data *) file->private_data;    int ret = 0;    int remains;
    switch (cmd) {    /* TODO 6: if cmd = MY_IOCTL_PRINT, display IOCTL_MESSAGE */    /* TODO 7: extra tasks, for home */    default:        ret = -EINVAL;    }
    return ret;}
static const struct file_operations so2_fops = {    .owner = THIS_MODULE,    /* TODO 2: add open and release functions */    .open = so2_cdev_open,    .release = so2_cdev_release,    /* TODO 4: add read function */    .read = so2_cdev_read,    /* TODO 5: add write function */    .write = so2_cdev_write,    /* TODO 6: add ioctl function */    .unlocked_ioctl = so2_cdev_ioctl,};
static int so2_cdev_init(void){    int err;    int i;
    /* TODO 1: register char device region for MY_MAJOR and NUM_MINORS starting at MY_MINOR */    err = register_chrdev_region(MKDEV(MY_MAJOR, MY_MINOR), NUM_MINORS, MODULE_NAME);    if (err < 0) {        pr_err("Failed to register char device: %d", err);        return err;    }    pr_info("WHOW, YOU REGISTERED %d DEVICES!!!!", NUM_MINORS);
    for (i = 0; i < NUM_MINORS; i++) {#ifdef EXTRA        /* TODO 7: extra tasks, for home */#else        /*TODO 4: initialize buffer with MESSAGE string */        memset(devs[i].buffer, 0, BUFSIZ);        strlcpy(devs[i].buffer, MESSAGE, BUFSIZ);        /* TODO 3: set access variable to 0, use atomic_set */        atomic_set(&devs[i].access, 0);#endif        /* TODO 7: extra tasks for home */        /* TODO 2: init and add cdev to kernel core */        cdev_init(&devs[i].cdev, &so2_fops);        cdev_add(&devs[i].cdev, MKDEV(MY_MAJOR, i), 1);    }
    return 0;}
static void so2_cdev_exit(void){    int i;
    for (i = 0; i < NUM_MINORS; i++) {        /* TODO 2: delete cdev from kernel core */        cdev_del(&devs[i].cdev);    }
    /* TODO 1: unregister char device region, for MY_MAJOR and NUM_MINORS starting at MY_MINOR */
    unregister_chrdev_region(MKDEV(MY_MAJOR, MY_MINOR), NUM_MINORS);    pr_info("WHOW, YOU UNREGISTERED %d DEVICES!!!!", NUM_MINORS);}
module_init(so2_cdev_init);module_exit(so2_cdev_exit);``````markdownThe `init` function completes the initialization.> 2. During read calls, copy the content of the kernel space buffer to the user space buffer.>    - Use the `copy_to_user()` function to copy information from kernel space to user space.>    - Ignore size and offset parameters for now. Assume that the userspace buffer is large enough and there's no need to validate the size parameter of the read function.>    - The value returned by the read call is the number of bytes transferred from the kernel space buffer to the user space buffer.> 3. After implementation, test using `cat /dev/so2_cdev`.
:::info
The command `cat /dev/so2_cdev` does not terminate (use Ctrl+C). Read the sections on [Reading and Writing](https://linux-kernel-labs-zh.xyz/labs/device_drivers.html#section-10) and [Accessing Process Address Space](https://linux-kernel-labs-zh.xyz/labs/device_drivers.html#section-8). To display the offset value, use the following construct: `pr_info("Offset: %lld \n", *offset)`; the data type for the offset value, `loff_t`, is a `typedef` for `long long int`.
:::
The `cat` command reads until the end of the file, which is indicated by a read returning 0. Therefore, to implement correctly, you need to update and use the offset parameter received in the read function and return 0 when the user reaches the end of the buffer.
Modify the driver so that the `cat` command terminates:
> 1. Use the size parameter.> 2. Update the offset parameter accordingly for each read.> 3. Ensure the read function returns the number of bytes copied to the user buffer.
:::info
By dereferencing the offset parameter, you can read and move the current position in the file. Its value needs to be updated after every successful read.
:::

We first test the first version, ignoring the offset.
```c/* * Character device drivers lab * * All tasks */
#include <asm/atomic.h>#include <linux/module.h>#include <linux/init.h>#include <linux/kernel.h>#include <linux/fs.h>#include <linux/cdev.h>#include <linux/uaccess.h>#include <linux/sched.h>#include <linux/wait.h>
#include "../include/so2_cdev.h"
MODULE_DESCRIPTION("SO2 character device");MODULE_AUTHOR("SO2");MODULE_LICENSE("GPL");
#define LOG_LEVEL  KERN_INFO
#define MY_MAJOR    42#define MY_MINOR    0#define NUM_MINORS    1#define MODULE_NAME    "so2_cdev"#define MESSAGE      "hello\n"#define IOCTL_MESSAGE    "Hello ioctl"
#ifndef BUFSIZ#define BUFSIZ    4096#endif

struct so2_device_data {  /* TODO 2: add cdev member */  struct cdev cdev;  /* TODO 4: add buffer with BUFSIZ elements */  char buffer[BUFSIZ];  /* TODO 7: extra members for home */  /* TODO 3: add atomic_t access variable to keep track if file is opened */  atomic_t access;};
struct so2_device_data devs[NUM_MINORS];
static int so2_cdev_open(struct inode *inode, struct file *file){  struct so2_device_data *data;
  /* TODO 2: print message when the device file is open. */  pr_info("Whow, the device file is open!!!!");
  /* TODO 3: inode->i_cdev contains our cdev struct, use container_of to obtain a pointer to so2_device_data */  data = container_of(inode->i_cdev, struct so2_device_data, cdev);
  file->private_data = data;
#ifndef EXTRA  /* TODO 3: return immediately if access is != 0, use atomic_cmpxchg */  if (atomic_cmpxchg(&data->access, 0, 1) != 0) {    pr_info("I'm using the device!!!!");    return -EBUSY;  }#endif
  // set_current_state(TASK_INTERRUPTIBLE);  // schedule_timeout(10 * HZ);
  return 0;}
static intso2_cdev_release(struct inode *inode, struct file *file){  /* TODO 2: print message when the device file is closed. */  pr_info("No!!! You closed the device, you evil!");
#ifndef EXTRA  struct so2_device_data *data =
    (struct so2_device_data *) file->private_data;
  /* TODO 3: reset access variable to 0, use atomic_set */  atomic_set(&data->access, 0);#endif  return 0;}
static ssize_tso2_cdev_read(struct file *file,    char __user *user_buffer,    size_t size, loff_t *offset){  struct so2_device_data *data =    (struct so2_device_data *) file->private_data;  size_t to_read;
#ifdef EXTRA  /* TODO 7: extra tasks for home */#endif
  /* TODO 4: Copy data->buffer to user_buffer, use copy_to_user */  int err = copy_to_user(user_buffer, data->buffer, strlen(data->buffer));  if (err) {    pr_err("Failed to copy data to user space\n");    return -EFAULT;  }  to_read = strlen(data->buffer);  pr_info("size: %d, to_read: %d", size, to_read);  pr_info("Content: %s", data->buffer);
  return to_read;}
static ssize_tso2_cdev_write(struct file *file,    const char __user *user_buffer,    size_t size, loff_t *offset){  struct so2_device_data *data =    (struct so2_device_data *) file->private_data;

  /* TODO 5: copy user_buffer to data->buffer, use copy_from_user */  /* TODO 7: extra tasks for home */
  return size;}
static longso2_cdev_ioctl(struct file *file, unsigned int cmd, unsigned long arg){  struct so2_device_data *data =    (struct so2_device_data *) file->private_data;  int ret = 0;  int remains;
  switch (cmd) {  /* TODO 6: if cmd = MY_IOCTL_PRINT, display IOCTL_MESSAGE */  /* TODO 7: extra tasks, for home */  default:    ret = -EINVAL;  }
  return ret;}
static const struct file_operations so2_fops = {  .owner = THIS_MODULE,/* TODO 2: add open and release functions */  .open = so2_cdev_open,  .release = so2_cdev_release,/* TODO 4: add read function */  .read = so2_cdev_read,/* TODO 5: add write function *//* TODO 6: add ioctl function */};
static int so2_cdev_init(void){  int err;  int i;
  /* TODO 1: register char device region for MY_MAJOR and NUM_MINORS starting at MY_MINOR */  err = register_chrdev_region(MKDEV(MY_MAJOR, MY_MINOR), NUM_MINORS, MODULE_NAME);  if (err < 0) {    pr_err("Failed to register char device: %d", err);    return err;  }  pr_info("WHOW, YOU REGISTERED %d DEVICES!!!!", NUM_MINORS);
  for (i = 0; i < NUM_MINORS; i++) {#ifdef EXTRA    /* TODO 7: extra tasks, for home */#else    /*TODO 4: initialize buffer with MESSAGE string */    strncpy(devs[i].buffer, MESSAGE, strlen(MESSAGE));    /* TODO 3: set access variable to 0, use atomic_set */    atomic_set(&devs[i].access, 0);#endif    /* TODO 7: extra tasks for home */    /* TODO 2: init and add cdev to kernel core */    cdev_init(&devs[i].cdev, &so2_fops);    cdev_add(&devs[i].cdev, MKDEV(MY_MAJOR, i), 1);  }
  return 0;}
static void so2_cdev_exit(void){  int i;
  for (i = 0; i < NUM_MINORS; i++) {    /* TODO 2: delete cdev from kernel core */    cdev_del(&devs[i].cdev);  }
  /* TODO 1: unregister char device region, for MY_MAJOR and NUM_MINORS starting at MY_MINOR */
  unregister_chrdev_region(MKDEV(MY_MAJOR, MY_MINOR), NUM_MINORS);  pr_info("WHOW, YOU REGISTERED %d DEVICES!!!!", NUM_MINORS);}
module_init(so2_cdev_init);module_exit(so2_cdev_exit);
Here, we read just a little bit
and then it keeps transmitting.Then let’s modify it so it works properly.
static ssize_tso2_cdev_read(struct file *file,    char __user *user_buffer,    size_t size, loff_t *offset){  struct so2_device_data *data =    (struct so2_device_data *) file->private_data;  size_t to_read;
#ifdef EXTRA  /* TODO 7: extra tasks for home */#endif
/* TODO 4: Copy data->buffer to user_buffer, use copy_to_user */ to_read = min(size, (unsigned int)(strlen(data->buffer) - *offset)); if (to_read <= 0) return 0; if (copy_to_user(user_buffer, data->buffer + *offset, to_read)) { pr_err("Failed to copy data to user space\n"); return -EFAULT; } *offset += to_read; return to_read;}root@qemux86:~/.ash_history/kernel# cat /dev/so2_cdevWHOW, YOU REGISTERED 1 DEVICES!!!!helloWhow, the device file is open!!!!6. Write Operation 
Add the functionality to write a message into the kernel buffer to replace the predefined message. Implement the write function in the driver. Follow the comments marked TODO 5.
Ignore the offset parameter at this point. Assume that the driver buffer is large enough. There’s no need to check the validity of the size parameter of the write function.
Note
The prototypes for device driver operations are located in the file_operations structure. Test using the following commands:
echo "arpeggio" > /dev/so2_cdevcat /dev/so2_cdevRead the sections on Reading and Writing and Accessing Process Address Space.
Simple and straightforward
static const struct file_operations so2_fops = {  .owner = THIS_MODULE,/* TODO 2: add open and release functions */  .open = so2_cdev_open,  .release = so2_cdev_release,/* TODO 4: add read function */  .read = so2_cdev_read,/* TODO 5: add write function */  .write = so2_cdev_write,/* TODO 6: add ioctl function */};
static ssize_tso2_cdev_write(struct file *file,    const char __user *user_buffer,    size_t size, loff_t *offset){  struct so2_device_data *data =    (struct so2_device_data *) file->private_data;

  /* TODO 5: copy user_buffer to data->buffer, use copy_from_user */  copy_from_user(data->buffer, user_buffer, size);  data->buffer[size] = '\0';  /* TODO 7: extra tasks for home */
  return size;}
7. ioctl Operation [¶](https://linux-kernel-labs-zh.xyz/
For this exercise, we want to add the ioctl `MY_IOCTL_PRINT` in the driver to display the message from the macro `IOCTL_MESSAGE`. Follow the comments marked with `TODO 6`.
To do this:
> 1. Implement the ioctl function in the driver.> 2. We need to call the ioctl function using `user/so2_cdev_test.c` and pass the appropriate parameters.> 3. For testing, we will use a userspace program (`user/so2_cdev_test.c`) to call the `ioctl` function with the required parameters.
:::tip
The macro `MY_IOCTL_PRINT` is defined in the file `include/so2_cdev.h`, which is shared between the kernel module and the userspace program.
Please read the [ioctl](https://linux-kernel-labs-zh.xyz/labs/device_drivers.html#ioctl) section in the experiment.:::
:::tip
The userspace code is automatically compiled when you run `make build` and copied when you run `make copy`.
Since we need to compile the program for a 32-bit qemu machine, if your host is 64-bit, you will need to install the `gcc-multilib` package.
:::
```c title="so2_cdev_ioctl.c"static longso2_cdev_ioctl(struct file *file, unsigned int cmd, unsigned long arg){  struct so2_device_data *data =    (struct so2_device_data *) file->private_data;  int ret = 0;  int remains;
  switch (cmd) {  /* TODO 6: if cmd = MY_IOCTL_PRINT, display IOCTL_MESSAGE */  case MY_IOCTL_PRINT:    pr_info("%s\n", IOCTL_MESSAGE);    break;  /* TODO 7: extra tasks, for home */  default:    ret = -EINVAL;  }
  return ret;}
static const struct file_operations so2_fops = {  .owner = THIS_MODULE,/* TODO 2: add open and release functions */  .open = so2_cdev_open,  .release = so2_cdev_release,/* TODO 4: add read function */  .read = so2_cdev_read,/* TODO 5: add write function */  .write = so2_cdev_write,/* TODO 6: add ioctl function */  .unlocked_ioctl = so2_cdev_ioctl};```
```bashroot@qemux86:~/skels/device_drivers/user# ./so2_cdev_test pWHOW, YOU REGISTERED 1 DEVICES!!!!Whow, the device file is open!!!!Hello ioctl```
### Ex1. ioctl with a Message[¶](https://linux-kernel-labs-zh.xyz/labs/device_drivers.html#ioctl-3)
Add two ioctl operations to the driver to modify the message associated with the driver. A fixed-length buffer (BUFFER_SIZE) should be used.
1. Add the following operations in the driver's ioctl function:   - `MY_IOCTL_SET_BUFFER`: to write a message to the device;   - `MY_IOCTL_GET_BUFFER`: to read a message from the device.2. To test, pass the required command-line arguments to the userspace program.
Using SET_BUFFER as an example, we can see it passes a char[] through ioctl
It looks something like this, but my virtual machine is not accessible.
```cstatic longso2_cdev_ioctl(struct file *file, unsigned int cmd, unsigned long arg){  struct so2_device_data *data =    (struct so2_device_data *) file->private_data;  int ret = 0;  int remains;
  switch (cmd) {  /* TODO 6: if cmd = MY_IOCTL_PRINT, display IOCTL_MESSAGE */  case MY_IOCTL_PRINT:    pr_info("%s\n", IOCTL_MESSAGE);    break;  /* TODO 7: extra tasks, for home */  case MY_IOCTL_SET_BUFFER:    if (copy_to_user(data->buffer, (char __user *)arg, BUFSIZ)) {      pr_err("ERR!!!");      return -EFAULT;    }    data->buffer[BUFSIZ - 1] = '\0';    pr_info("I set %s", data->buffer);    break;  case MY_IOCTL_GET_BUFFER:    if(copy_to_user((char __user *) arg, data->buffer, strlen(data->buffer))) {      pr_err("ERR!!!");      return -EFAULT;    }    pr_info("I put %s to 0x%lx", data->buffer, arg);    break;  default:    ret = -EINVAL;  }
  return ret;}```
## I/O Access and Interrupts
### 0. Introduction[¶](https://linux-kernel-labs-zh.xyz/labs/interrupts.html#section-14)
Use [LXR](http://elixir.free-electrons.com/linux/latest/source) to find the definitions of the following symbols in the Linux kernel:
- `struct resource`- `request_region()` and `__request_region()`- `request_irq()` and `request_threaded_irq()`- :c:func:`inb` (for x86 architecture)
Analyze the following Linux code:
- Keyboard initialization function `i8042_setup_kbd()`- AT or PS/2 keyboard interrupt function `atkbd_interrupt()`
- `struct resource`: It appears to be a tree structure, with markers for parents, siblings, and children. It also includes some flags.
  ```c  struct resource {    resource_size_t start;    resource_size_t end;    const char *name;    unsigned long flags;    unsigned long desc;    struct resource *parent, *sibling, *child;  };  ```
- `request_region()`: A wrapper around `__request_region`. It allocates a resource with GFP_KERNEL and marks the parent, start, n, name, and flags information.
  ```c  #define request_region(start,n,name)    __request_region(&ioport_resource, (start), (n), (name), 0)
  struct resource *__request_region(struct resource *parent,            resource_size_t start, resource_size_t n,            const char *name, int flags)  {    struct resource *res = alloc_resource(GFP_KERNEL);    int ret;
    if (!res)      return NULL;
    write_lock(&resource_lock);    ret = __request_region_locked(res, parent, start, n, name, flags);    write_unlock(&resource_lock);
    if (ret) {      free_resource(res);      return NULL;    }
    if (parent == &iomem_resource)      revoke_iomem(res);
    return res;  }  ```
- `request_irq`: Also a wrapper for `request_threaded_irq`, essentially a wrapper without a thread_fn as the thread context. It is used to register an interrupt. If the irqflags have the SHARED flag, there must be a unique identifier dev_id. It then allocates an irqaction structure via GFP_KERNEL and adds the interrupt on the chip.
  ```c  static inline int __must_check  request_irq(unsigned int irq, irq_handler_t handler, unsigned long flags,        const char *name, void *dev)  {    return request_threaded_irq(irq, handler, NULL, flags, name, dev);  }
  int request_threaded_irq(unsigned int irq, irq_handler_t handler,         irq_handler_t thread_fn, unsigned long irqflags,         const char *devname, void *dev_id)  {    struct irqaction *action;    struct irq_desc *desc;    int retval;
    if (irq == IRQ_NOTCONNECTED)      return -ENOTCONN;
    /*     * Sanity-check: shared interrupts must pass in a real dev-ID,     * otherwise we'll have trouble later trying to figure out     * which interrupt is which (messes up the interrupt freeing     * logic etc).     *     * Also shared interrupts do not go well with disabling auto enable.     * The sharing interrupt might request it while it's still disabled     * and then wait for interrupts forever.     *     * Also IRQF_COND_SUSPEND only makes sense for shared interrupts and     * it cannot be set along with IRQF_NO_SUSPEND.     */    if (((irqflags & IRQF_SHARED) && !dev_id) ||        ((irqflags & IRQF_SHARED) && (irqflags & IRQF_NO_AUTOEN)) ||        (!(irqflags & IRQF_SHARED) && (irqflags & IRQF_COND_SUSPEND)) ||        ((irqflags & IRQF_NO_SUSPEND) && (irqflags & IRQF_COND_SUSPEND)))      return -EINVAL;
    desc = irq_to_desc(irq);    if (!desc)      return -EINVAL;
    if (!irq_settings_can_request(desc) ||        WARN_ON(irq_settings_is_per_cpu_devid(desc)))      return -EINVAL;
    if (!handler) {      if (!thread_fn)        return -EINVAL;      handler = irq_default_primary_handler;    }
    action = kzalloc(sizeof(struct irqaction), GFP_KERNEL);    if (!action)      return -ENOMEM;
    action->handler = handler;    action->thread_fn = thread_fn;    action->flags = irqflags;    action->name = devname;    action->dev_id = dev_id;
    retval = irq_chip_pm_get(&desc->irq_data);    if (retval < 0) {      kfree(action);      return retval;    }
    retval = __setup_irq(irq, desc, action);
    if (retval) {      irq_chip_pm_put(&desc->irq_data);      kfree(action->secondary);      kfree(action);    }
  #ifdef CONFIG_DEBUG_SHIRQ_FIXME    if (!retval && (irqflags & IRQF_SHARED)) {      /*       * It's a shared IRQ -- the driver ought to be prepared for it       * to happen immediately, so let's make sure....       * We disable the irq to make sure that a 'real' IRQ doesn't       * run in parallel with our fake.       */      unsigned long flags;
      disable_irq(irq);      local_irq_save(flags);
      handler(irq, dev_id);
      local_irq_restore(flags);      enable_irq(irq);    }  #endif    return retval;  }  ```
- `inb`: I couldn't find the specific implementation of this symbol; it seems to be architecture-dependent. However, in x86, it is wrapped. Essentially, it reads a byte of data from a port.
  ```c  u8 inb(unsigned long port)  {    return ioread8(ioport_map(port, 1));  }  ```
Analyzing the code
**i8042_setup_kbd()**:
```````cstatic int i8042_setup_kbd(void){  int error;
  error = i8042_create_kbd_port();  if (error)    return error;
  error = request_irq(I8042_KBD_IRQ, i8042_interrupt, IRQF_SHARED,          "i8042", i8042_platform_device);  if (error)    goto err_free_port;
  error = i8042_enable_kbd_port();  if (error)    goto err_free_irq;
  i8042_kbd_irq_registered = true;  return 0;
 err_free_irq:  free_irq(I8042_KBD_IRQ, i8042_platform_device); err_free_port:  i8042_free_kbd_port();  return er``````cstatic int i8042_create_kbd_port(void){    struct serio *serio;    struct i8042_port *port = &i8042_ports[I8042_KBD_PORT_NO];
    serio = kzalloc(sizeof(struct serio), GFP_KERNEL);    if (!serio)        return -ENOMEM;
    serio->id.type = i8042_direct ? SERIO_8042 : SERIO_8042_XL;    serio->write = i8042_dumbkbd ? NULL : i8042_kbd_write;    serio->start = i8042_start;    serio->stop = i8042_stop;    serio->close = i8042_port_close;    serio->ps2_cmd_mutex = &i8042_mutex;    serio->port_data = port;    serio->dev.parent = &i8042_platform_device->dev;    strscpy(serio->name, "i8042 KBD port", sizeof(serio->name));    strscpy(serio->phys, I8042_KBD_PHYS_DESC, sizeof(serio->phys));    strscpy(serio->firmware_id, i8042_kbd_firmware_id,            sizeof(serio->firmware_id));    set_primary_fwnode(&serio->dev, i8042_kbd_fwnode);
    port->serio = serio;    port->irq = I8042_KBD_IRQ;
    return 0;}```````
The function i8042_create_kbd_port essentially creates a struct serio instance and sets its values.
static int i8042_enable_kbd_port(void){    i8042_ctr &= ~I8042_CTR_KBDDIS;    i8042_ctr |= I8042_CTR_KBDINT;
    if (i8042_command(&i8042_ctr, I8042_CMD_CTL_WCTR)) {        i8042_ctr &= ~I8042_CTR_KBDINT;        i8042_ctr |= I8042_CTR_KBDDIS;        pr_err("Failed to enable KBD port\n");        return -EIO;    }
    return 0;}
The function i8042_enable_kbd_port enables the entire port by setting control registers. Specifically, it clears the DISABLE bit, enables the INTERRUPT bit, and then sends the WriteControlRegister command.
static irqreturn_t i8042_interrupt(int irq, void *dev_id){    struct i8042_port *port;    struct serio *serio;    unsigned long flags;    unsigned char str, data;    unsigned int dfl;    unsigned int port_no;    bool filtered;    int ret = 1;
    spin_lock_irqsave(&i8042_lock, flags);
    str = i8042_read_status();    if (unlikely(~str & I8042_STR_OBF)) {        spin_unlock_irqrestore(&i8042_lock, flags);        if (irq)            dbg("Interrupt %d, without any data\n", irq);        ret = 0;        goto out;    }
    data = i8042_read_data();
    // ... (rest of the code)
    spin_unlock_irqrestore(&i8042_lock, flags);
    if (likely(serio && !filtered))        serio_interrupt(serio, data, dfl);
out:    return IRQ_RETVAL(ret);}
The interrupt function is a bit more complex but essentially reads data after acquiring a spin lock, handles multiplexer errors and data, and calls serio_interrupt to actually process the data.
atkbd_interrupt()
I couldn’t find this function, but looking through the AT driver’s code, I see that its interrupt is ps2_interrupt, so let’s analyze that instead.
static struct serio_driver atkbd_drv = { .driver = { .name = "atkbd", .dev_groups = atkbd_attribute_groups, }, .description = DRIVER_DESC, .id_table = atkbd_serio_ids, .interrupt = ps2_interrupt, .connect = atkbd_connect, .reconnect = atkbd_reconnect, .disconnect = atkbd_disconnect, .cleanup = atkbd_cleanup,};This is much simpler. It gets the dev from serio, retrieves the receive_handler, and processes different types of data accordingly.
irqreturn_t ps2_interrupt(struct serio *serio, u8 data, unsigned int flags) {    struct ps2dev *ps2dev = serio_get_drvdata(serio);    enum ps2_disposition rc;
    rc = ps2dev->pre_receive_handler(ps2dev, data, flags);    switch (rc) {    case PS2_ERROR:        ps2_cleanup(ps2dev);        break;
    case PS2_IGNORE:        break;
    case PS2_PROCESS:        if (ps2dev->flags & PS2_FLAG_ACK)            ps2_handle_ack(ps2dev, data);        else if (ps2dev->flags & PS2_FLAG_CMD)            ps2_handle_response(ps2dev, data);        else            ps2dev->receive_handler(ps2dev, data);        break;    }
    return IRQ_HANDLED;}
1. Request I/O Ports
First, our goal is to allocate memory for hardware devices in the I/O space. We notice that we cannot allocate space for the keyboard because the designated area has already been allocated. Then, we will allocate I/O space for unused ports.
The kbd.c file contains the framework for the keyboard driver. Browse the source code and inspect the kbd_init() function. Note that the I/O ports we need are I8042_STATUS_REG and I8042_DATA_REG.
Follow the section marked with TODO 1 in the skeleton. In the kbd_init() function, request the I/O ports for the keyboard and ensure to check for errors and perform appropriate cleanup in case of an error. When requesting, use the MODULE_NAME macro to set the caller’s ID string (name) to the value of this macro. Additionally, add code in the kbd_exit() function to release the I/O ports.
static int kbd_init(void){    int err;
    err = register_chrdev_region(MKDEV(KBD_MAJOR, KBD_MINOR),                                 KBD_NR_MINORS, MODULE_NAME);    if (err != 0) {        pr_err("register_region failed: %d\n", err);        goto out;    }
    /* TODO 1: request the keyboard I/O ports */    if (!request_region(0x65, 1, MODULE_NAME) ||        !request_region(0x61, 1, MODULE_NAME)) {        goto out_unregister;    }
    /* TODO 3: initialize spinlock */
    /* TODO 2: Register IRQ handler for keyboard IRQ (IRQ 1). */
    cdev_init(&devs[0].cdev, &kbd_fops);    cdev_add(&devs[0].cdev, MKDEV(KBD_MAJOR, KBD_MINOR), 1);
    pr_notice("Driver %s loaded\n", MODULE_NAME);    return 0;
    /*TODO 2: release regions in case of error */
out_unregister:    unregister_chrdev_region(MKDEV(KBD_MAJOR, KBD_MINOR),                             KBD_NR_MINORS);out:    return err;}
static void kbd_exit(void){    cdev_del(&devs[0].cdev);
    /* TODO 2: Free IRQ. */
    /* TODO 1: release keyboard I/O ports */
    release_region(I8042_STATUS_REG, 1);    release_region(I8042_DATA_REG, 1);

unregister_chrdev_region(MKDEV(KBD_MAJOR, KBD_MINOR), KBD_NR_MINORS); pr_notice("Driver %s unloaded\n", MODULE_NAME);}root@qemux86:~/skels/interrupts# cat /proc/ioports0000-0cf7 : PNP0A03:000000-001f : dma10020-0021 : pic10040-0043 : timer00050-0053 : timer10060-0060 : keyboard0061-0061 : kbd0064-0064 : keyboard0065-0065 : kbdYou can see it’s working.
2. Interrupt Handler Routine
For this task, we will implement and register an interrupt handler routine for the keyboard interrupt. Before proceeding, you may want to review the Requesting Interrupts section.
Follow the part marked with TODO 2 in the skeleton.
First, define an empty interrupt handler routine named kbd_interrupt_handler().
Compile, copy, and load the module into the kernel. Check whether the interrupt line has been registered by looking at /proc/interrupts. Determine the IRQ number from the source code (see I8042_KBD_IRQ) and verify that there are two registered drivers on that interrupt line (this indicates that we have a shared interrupt line): the initial i8042 driver and our driver.
Print a message inside the routine to ensure it is being called. Compile and reload the module into the kernel. Use dmesg to check if the interrupt handler routine is called when keys are pressed in the virtual machine. Also note that keyboard interrupts are not triggered when using a serial console.
```This is the process of handling code, where we need to register interrupts during initialization and then return an IRQ_NONE in the interrupt handler to pass the handling over to other keyboard handlers.
/* TODO 2: implement interrupt handler */irqreturn_t kbd_interrupt_handler(int irq_no, void *dev_id) {  /* TODO 3: read the scancode */  /* TODO 3: interpret the scancode */  /* TODO 3: display information about the keystrokes */  /* TODO 3: store ASCII key to buffer */  return IRQ_NONE;
}
...    /* TODO 2: Register IRQ handler for keyboard IRQ (IRQ 1). */  if (request_irq(I8042_KBD_IRQ, kbd_interrupt_handler, IRQF_SHARED, MODULE_NAME, &devs[0])) {    pr_err("request_irq failed\n");    err = -EBUSY;    goto out_unregister;  }
static void kbd_exit(void){  cdev_del(&devs[0].cdev);
/* TODO 2: Free IRQ. */ free_irq(I8042_KBD_IRQ, &devs[0]);root@qemux86:~/skels/interrupts# cat /proc/interrupts CPU0 1: 9 IO-APIC 1-edge i8042, kbdWe can see that our kbd is already registered there.
3. Storing ASCII Keys in the Buffer
Next, we want to collect key inputs into a buffer and send its contents to user space. To achieve this, we will add the following content in the interrupt handler:
- Capture the pressed keys (only capture pressed keys, ignore released keys)
- Identify the ASCII character
- Copy and store the ASCII character corresponding to the key in the device’s buffer
Please follow the instructions marked as TODO 3 in the skeleton code.
Reading the Data Register
First, fill in the i8042_read_data() function to read the I8042_DATA_REG register of the keyboard controller. The function should only return the value of the register. The value of the register is also known as the scan code, which is generated with each key press.
Call i8042_read_data() in kbd_interrupt_handler() and print the read value.
Print information about the key press in the following format:
pr_info("IRQ:% d, scancode = 0x%x (%u,%c)\n", irq_no, scancode, scancode, scancode);Here, scancode, the scan code, is the value of the register read using the i8042_read_data() function.
Note that the scan code (the value of the read register) is not the ASCII character of the pressed key. We need to understand the scan code.
Unlike before, we open XLaunch and run it with --allow-gui. After compilation, we also use make gui to launch it, as the serial port won’t trigger interrupts.
/* * Return the value of the DATA register. */static inline u8 i8042_read_data(void){  u8 val;  /* TODO 3: Read DATA register (8 bits). */  val = inb(I8042_DATA_REG);  return val;}
/* TODO 2: implement interrupt handler */irqreturn_t kbd_interrupt_handler(int irq_no, void *dev_id) {  /* TODO 3: read the scancode */  u8 scancode = i8042_read_data();  pr_info("IRQ:%d, scancode = 0x%x (%u,%c)\n",    irq_no, scancode, scancode, scancode);  /* TODO 3: interpret the scancode */  /* TODO 3: display information about the keystrokes */  /* TODO 3: store ASCII key to buffer */  return IRQ_NONE;
}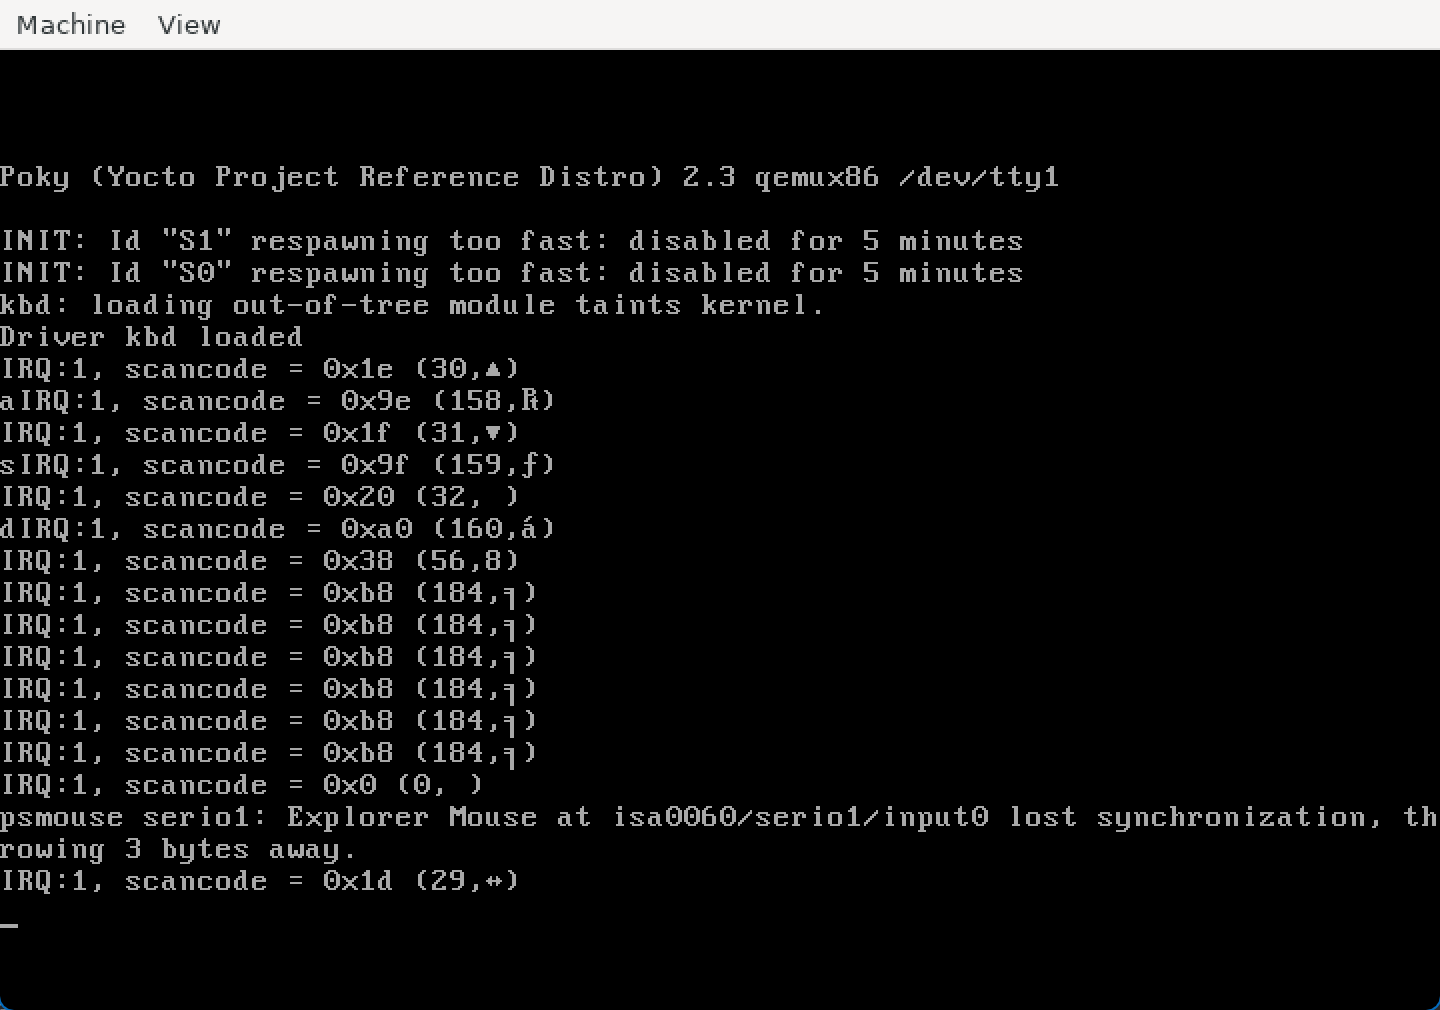
We can see that there is now a response when pressing a key, 666
Interpreting Scan Codes
Note that the register value is the scan code, not the ASCII value of the pressed character. Also note that interrupts are sent both when a key is pressed and when it is released. We only need to obtain the scan code when the key is pressed and then decode the ASCII character.
In the interrupt handler, first check the scan code to determine whether the key was pressed or released, and then determine the corresponding ASCII character.
Just add a couple of lines:
/* TODO 3: display information about the keystrokes */ if (is_key_press(scancode)) { const char ch = (const char) get_ascii(scancode); pr_info("IRQ %d: scancode=0x%x (%u) pressed=1 ch=%c\n", irq_no, scancode, scancode, ch); }Storing Characters in the Buffer
We want to collect the pressed characters (not other keys) into a circular buffer so they can be accessed from user space.
Update the interrupt handler to add the ASCII character of the pressed key to the end of the device buffer. If the buffer is full, the character will be discarded.
A spin lock needs to be added, roughly like this:
struct kbd {  struct cdev cdev;  /* TODO 3: add spinlock */  spinlock_t lock;  char buf[BUFFER_SIZE];  size_t put_idx, get_idx, count;} devs[1];
/* TODO 2: implement interrupt handler */irqreturn_t kbd_interrupt_handler(int irq_no, void *dev_id) {  /* TODO 3: read the scancode */  u8 scancode = i8042_read_data();  /* TODO 3: interpret the scancode */  pr_info("IRQ:%d, scancode = 0x%x (%u,%c)\n",    irq_no, scancode, scancode, scancode);  /* TODO 3: display information about the keystrokes */  if (is_key_press(scancode)) {    const char ch = (const char) get_ascii(scancode);    pr_info("IRQ %d: scancode=0x%x (%u) pressed=1 ch=%c\n",        irq_no, scancode, scancode, ch);    /* TODO 3: store ASCII key to buffer */    spin_lock(&((struct kbd *) dev_id)->lock);    put_char((struct kbd *) dev_id, ch);    spin_unlock(&((struct kbd *) dev_id)->lock);  }
  return IRQ_NONE;
}
static int kbd_init(void){  int err;
  err = register_chrdev_region(MKDEV(KBD_MAJOR, KBD_MINOR),             KBD_NR_MINORS, MODULE_NAME);  if (err != 0) {    pr_err("register_region failed: %d\n", err);    goto out;  }
  /* TODO 1: request the keyboard I/O ports */  if (!request_region(0x65, 1, MODULE_NAME) ||    !request_region(0x61, 1, MODULE_NAME)) {    pr_err("request_region failed\n");    err = -EBUSY;    goto out_unregister;  }
  /* TODO 3: initialize spinlock */  spin_lock_init(&devs[0].lock);
4. Reading the Buffer
To access the data from the keyboard logger, we need to send it to user space. We will use the /dev/kbd character device to achieve this. When reading data from this device, we will fetch the key data from the buffer in kernel space.
In this step, follow the instructions marked as TODO 4 in the kbd_read() function.
The implementation of get_char() is similar to put_char(). Be careful when implementing the circular buffer.
In the kbd_read() function, copy data from the buffer to the user space buffer.
To test, you need to create the /dev/kbd character device driver before reading using mknod. The major and minor device numbers of the device are defined as KBD_MAJOR and KBD_MINOR:
mknod /dev/kbd c 42 0Build, copy, and boot the virtual machine and load the module. Test using the following command:
cat /dev/kbdWhen reading, we need to disable interrupts.
static bool get_char(char *c, struct kbd *data){  /* TODO 4: get char from buffer; update count and get_idx */  if (data->count > 0) {    *c = data->buf[data->get_idx];    data->get_idx = (data->get_idx + 1) % BUFFER_SIZE;    data->count--;    return true;  }  return false;}
static ssize_t kbd_read(struct file *file,  char __user *user_buffer,      size_t size, loff_t *offset){  struct kbd *data = (struct kbd *) file->private_data;  size_t read = 0;  /* TODO 4: read data from buffer */  unsigned long flags;

  while (read < size) {    char c;    spin_lock_irqsave(&data->lock, flags);    i```cif (!get_char(&c, data)) {  spin_unlock_irqrestore(&data->lock, flags);  break;}spin_unlock_irqrestore(&data->lock, flags);if (copy_to_user(user_buffer + read, &c, 1)) {  spin_unlock_irqrestore(&data->lock, flags);  return -EFAULT;}read++;}return read;
5. Reset the Buffer 
If a write operation is performed on the device, reset the buffer. In this step, follow the part marked with TODO 5 in the skeleton.
Implement reset_buffer() and add the write operation to kbd_fops.
I didn’t understand this.
static void reset_buffer(struct kbd *data){  /* TODO 5: reset count, put_idx, get_idx */  data->count = 0;  data->put_idx = 0;  data->get_idx = 0;}
/* TODO 5: add write operation and reset the buffer */
static ssize_t kdb_write(struct file *file, const char __user *user_buffer, size_t size, loff_t *offset) {  struct kbd *data = (struct kbd *) file->private_data;  unsigned long flags;
  spin_lock_irqsave(&data->lock, flags);  reset_buffer(data);  spin_unlock_irqrestore(&data->lock, flags);
    return 0;
}
static const struct file_operations kbd_fops = { .owner = THIS_MODULE, .open = kbd_open, .release = kbd_release, .read = kbd_read, /* TODO 5: add write operation */ .write = kdb_write};{/* AI */}