Quick Guide: Installing Windows 11 with QEMU on a Docker Server

You’ll need CPU host passthrough enabled (check /proc/cpuinfo for details).
Assuming QEMU and related packages are already installed, I won’t repeat those steps here.
Preparation
Download the Windows 11 ISO:
Download the Virtio Windows driver ISO:
https://fedorapeople.org/groups/virt/virtio-win/direct-downloads/archive-virtio/
Installation
Create a qcow2 Disk
qemu-img create -f qcow2 windows11.qcow2 120G
Start QEMU
Create a shell script (e.g., run-win11.sh):
#!/bin/sh

qemu-system-x86_64 \
  -enable-kvm \
  -smp 12,cores=6,threads=2 \
  -m 12G \
  -machine usb=on \
  -device usb-tablet \
  -cpu host \
  -vga virtio \
  -device e1000,netdev=net0 \
  -netdev user,id=net0,net=192.168.20.0/24,dhcpstart=192.168.20.20 \
  -drive file=windows11.qcow2,if=virtio \
  -drive file=virtio-win-0.1.262.iso,index=1,media=cdrom \
  -drive file=Windows.iso,index=2,media=cdrom \
  -vnc :1
Windows.isois the Windows 11 installation ISO.windows11.qcow2is the VM disk you created.virtio-win-*.isois the Virtio driver ISO.
This command opens VNC on display :1 (port 5901). I forwarded it over SSH:
ssh -L 5901:localhost:5901 root@<host> -p <port>
Connect via VNC
On my Arch host, I used TigerVNC:
vncviewer localhost:5901
You should now see the Windows installer.
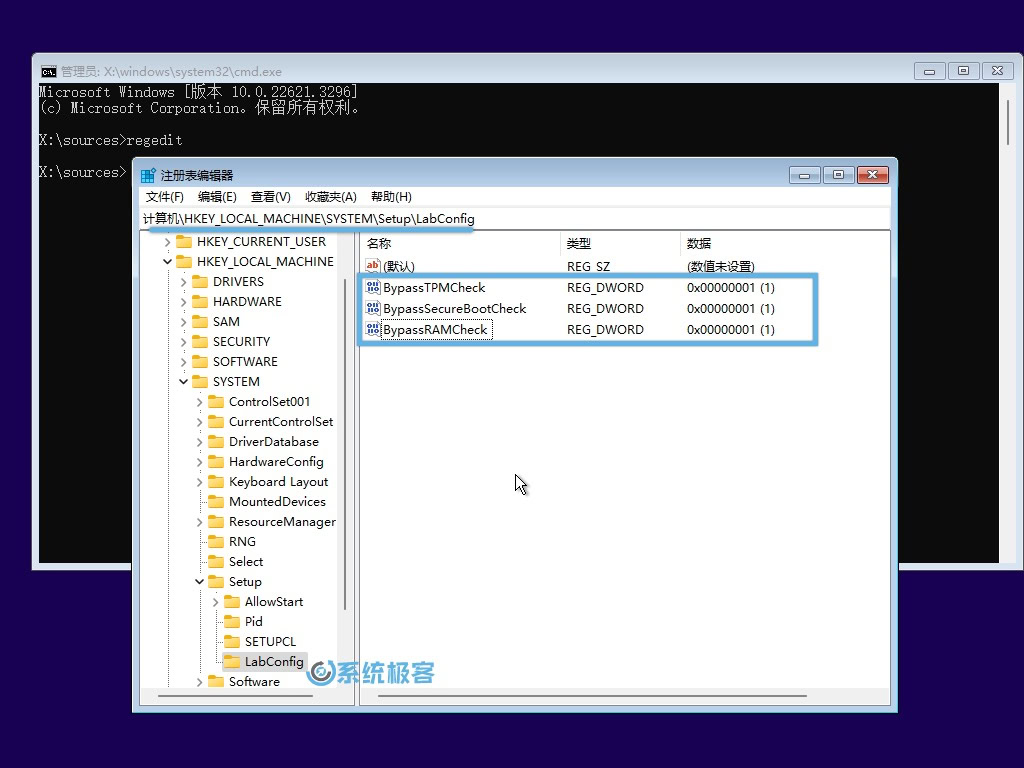
Next, bypass the TPM/Secure Boot/RAM checks:
- In the installer, press Shift+F10 to open a Command Prompt.
- Run
regeditto open the Registry Editor. - Navigate to
HKEY_LOCAL_MACHINE\SYSTEM\Setup. - Create a new key named
LabConfig. - Under
LabConfig, create three DWORD (32-bit) values and set them to1:- BypassTPMCheck
- BypassSecureBootCheck
- BypassRAMCheck
Continue the installer until you reach the disk selection screen. Click Load Driver, browse to the Virtio driver, and choose the correct architecture.
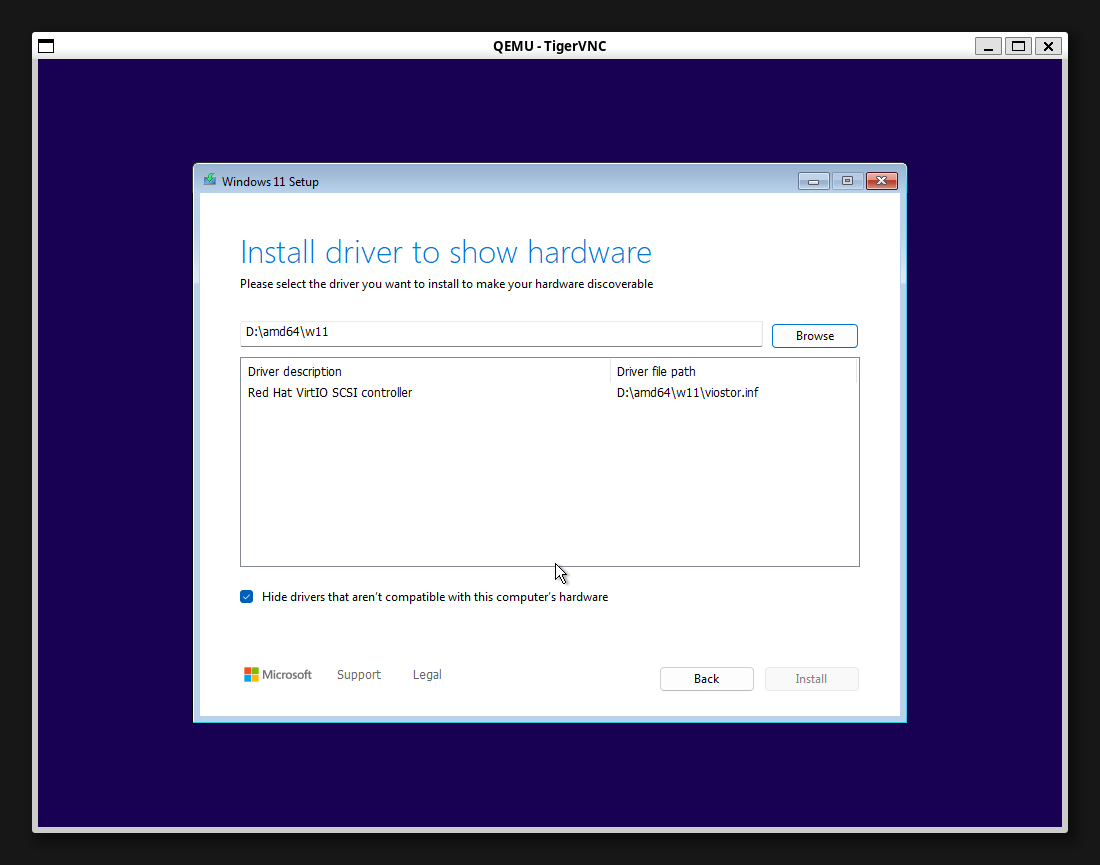
After loading the driver, your Virtio disk appears. Proceed with the installation as usual.
References
- Using QEMU to Try Windows 11 (Chinese)
- Windows 11: 3 Easy Ways to Bypass TPM, CPU and Secure Boot Checks (Chinese)
- Internal team resources
This content is generated by LLM and might be wrong or incomplete. Refer to the original Chinese version if you encounter any issues.