记录一下 WSL2 更换内核的过程
I’m about to start looking into Kernel Pwn recently, but it seems that the kernel of WSL2 is not the original one, so I decided to replace it.
{/* truncate */}
Prerequisites
Make sure you are using WSL2 instead of WSL, and your Windows version meets the requirement of Windows build 19041 or higher.
Check Kernel Version
First, let’s check your current kernel version.
I have installed neofetch, so I used neofetch directly, but you can also use commands like cat /proc/version or uname -a to check.
The original kernel version is 5.15.79.1.

Choose Kernel Version
When I installed WSL2, the Ubuntu version was 22.04.1 LTS. As of 2023/02/13, the latest kernel version is 6.1.9, which is compatible with my Ubuntu version, so I chose to upgrade to the latest version.
Download the kernel from The Linux Kernel Archives. I used a mirror site.
# Replace the filename and the folder name according to your cases!curl -LO https://mirrors.edge.kernel.org//pub/linux/kernel/v6.x/linux-6.1.9.tar.gztar xf linux-6.1.9.tar.gzcd linux-6.1.9Use WSL2-Linux-Kernel Configuration File
This .config file has been adjusted and optimized for wsl2. Although the branch was still linux-msft-wsl-5.15.y when I installed it, which is compiled for the 5.15 kernel, it still works for the 6.1.9 kernel I installed.
curl https://raw.githubusercontent.com/microsoft/WSL2-Linux-Kernel/linux-msft-wsl-5.15.y/Microsoft/config-wsl >> .config(Optional) Adjust the Configuration File
I modified the CONFIG_LOCALVERSION field in the .config file to indicate the kernel characteristics, and you can make more modifications as needed.
Compile the Kernel
Since we already have the .config file, we can just run make to compile the kernel.
sudo make -j20 && sudo make modules -j20 && sudo make modules_install -j20 && sudo make install -j20Before compilation, there will be many configuration options (i.e., new kernel configuration options not specified in the .config) that you need to specify. Unless you have specific requirements, you can just press Enter all the way through.
Wait patiently for the installation to finish. You can find a similar field in the standard output indicating the kernel path after Kernel:.
Kernel: arch/x86/boot/bzImage is ready (#2) DESCEND objtool DESCEND bpf/resolve_btfids CALL scripts/checksyscalls.sh DEPMOD /lib/modules/6.1.9-linux-standard-WSL2 INSTALL /boot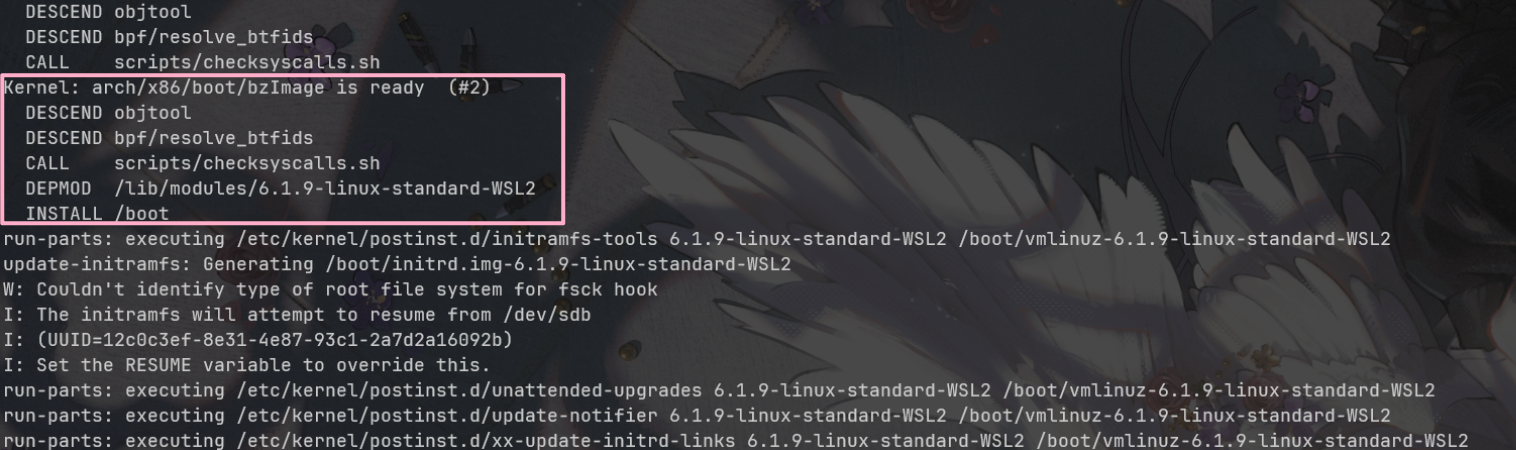
Modify the Kernel
Copy it to the desired location. In my case, I copied it to E:\Ubuntu-2204LTS\linux_kernel_6.1.9.
cp arch/x86/boot/bzImage /mnt/E/Ubuntu-2204LTS/linux_kernel_6.1.9Open your user directory and modify the .wslconfig file. Add a kernel field under the [wsl2] tag, with the value being the Windows path with escaped backslashes.
For example, in my case, the .wslconfig file looks like this.
[wsl2]kernelCommandLine = vsyscall=emulatekernel=E:\\Ubuntu-2204LTS\\linux_kernel_6.1.9
[user]default=rootRestart WSL
Now, restart your WSL2 and check the kernel version again.
If everything goes well, your kernel should have been successfully updated.
wsl --shutdownwsl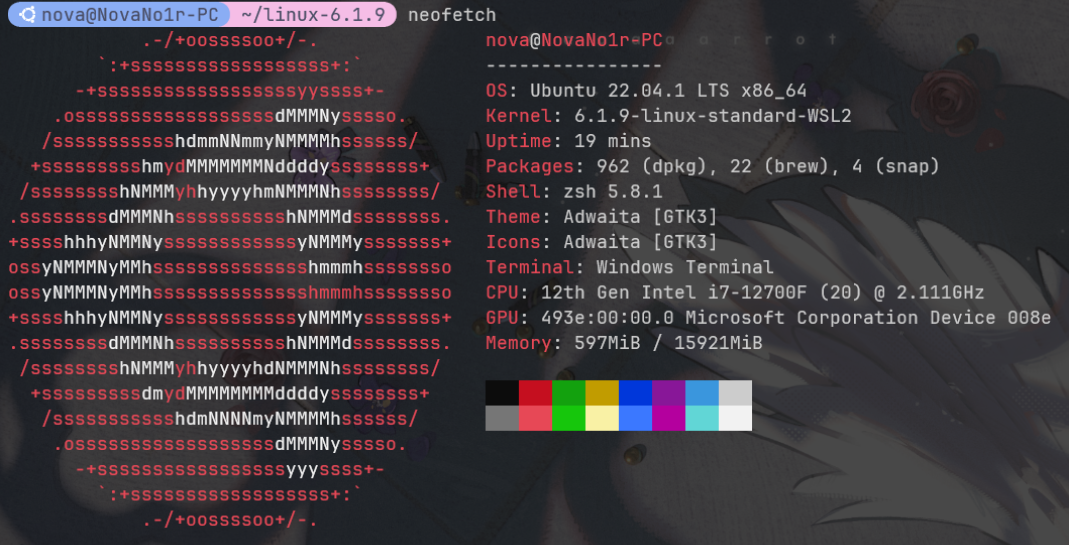
{/* AI */}